

Vienna comes into view in layers, Gothic spires above stone lanes, Baroque palaces glowing pale gold, Art Nouveau details curling over doorways, and modern towers rising beyond it all. For architecture photography, that mix is hard to beat, because you can move from medieval texture to imperial scale to clean contemporary lines in a single shoot.
Still, Vienna can test your patience if you arrive at the wrong hour or stop at the wrong square. Good buildings flatten in harsh light, strong facades disappear behind tour groups, and some of the city’s best angles are easy to miss if you don’t know where to stand. This guide keeps the focus on the best photo spots in Vienna for architecture, why each one earns a place on your route, and when to go for better light, cleaner lines, and fewer people in the frame.
So before you set out with a wide lens or a longer focal length, start with the locations that give Vienna its strongest architectural images.
Start with Vienna’s grand classics for your strongest architecture shots
If you’re building a Vienna photo route, start with the landmarks that almost never miss. These are the city’s most dependable architecture shots, because they give you height, symmetry, layered facades, and strong lines without much guesswork. Go early for cleaner frames, then return near golden hour or blue hour when the stone warms up and the city starts to glow.
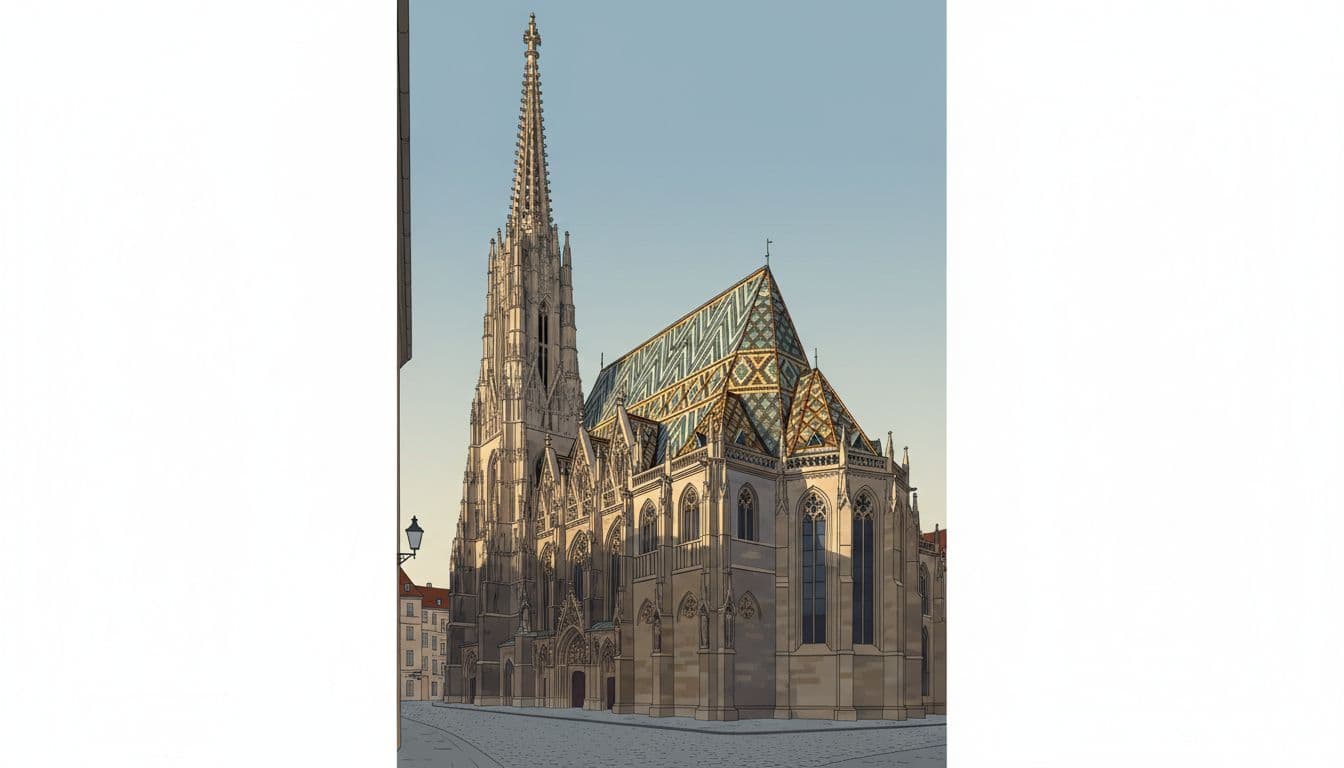
Stephansdom gives you Gothic detail from street level to skyline views
Stephansdom is one of the best places in Vienna to photograph vertical drama. The south tower pulls your eye upward, while the carved stonework keeps the frame busy with texture, shadow, and repeating detail. Then there’s the tiled roof, which adds color and pattern that can turn a simple city shot into something richer.
Early morning works best here, because the square and nearby lanes fill up fast. If you want cleaner compositions, step off the main plaza and shoot from the side streets, where the cathedral appears between buildings like a blade of stone. Those tighter approaches help you frame the spire and cut out some of the visual noise that builds later in the day.
If you want context beyond the facade, the south tower view adds a different angle. From above, you can work in rooftops, street grids, and the cathedral’s place in the city fabric. For practical visitor details, Visiting Vienna’s tower guide is a useful reference before you go.
This is also a great place to try black-and-white edits. The cathedral’s sharp lines, worn stone, and deep shadows hold up well without color. When the roof isn’t your main subject, monochrome can make the whole building feel more sculptural and a bit more timeless.
Hofburg Palace is the place for imperial scale, arches, and evening glow
Hofburg gives you a different kind of power. Where Stephansdom rises like a spear, this complex spreads wide, with curved facades, arches, domes, and courtyards that feel built for grand compositions. Michaelerplatz is a strong starting point, especially if you want that sweeping front view with the palace wrapping around the frame.
A wide-angle lens helps here because the scale is hard to fit in otherwise. You can keep the full curve of the facade, hold onto the arch details, and still show the open space in front. If you shoot too tight, the palace loses some of its weight.
Early morning is better for cleaner shots, especially around the busiest entrances. Later on, the scene gets busier, and the architecture has to compete with traffic and foot traffic. Still, the trade-off can be worth it at blue hour, when the building lights switch on and the stone starts to glow against the cooler sky.

Don’t stop at the front. Walk into the courtyards, look for repeated archways, and use the curved walls to guide the eye through the frame. For angle ideas, this Hofburg photo spot guide can help you scout before you arrive. If you stay after sunset, you’ll get some of the palace’s most polished architecture images of the day.
For Hofburg, morning gives you order, but evening gives you atmosphere.
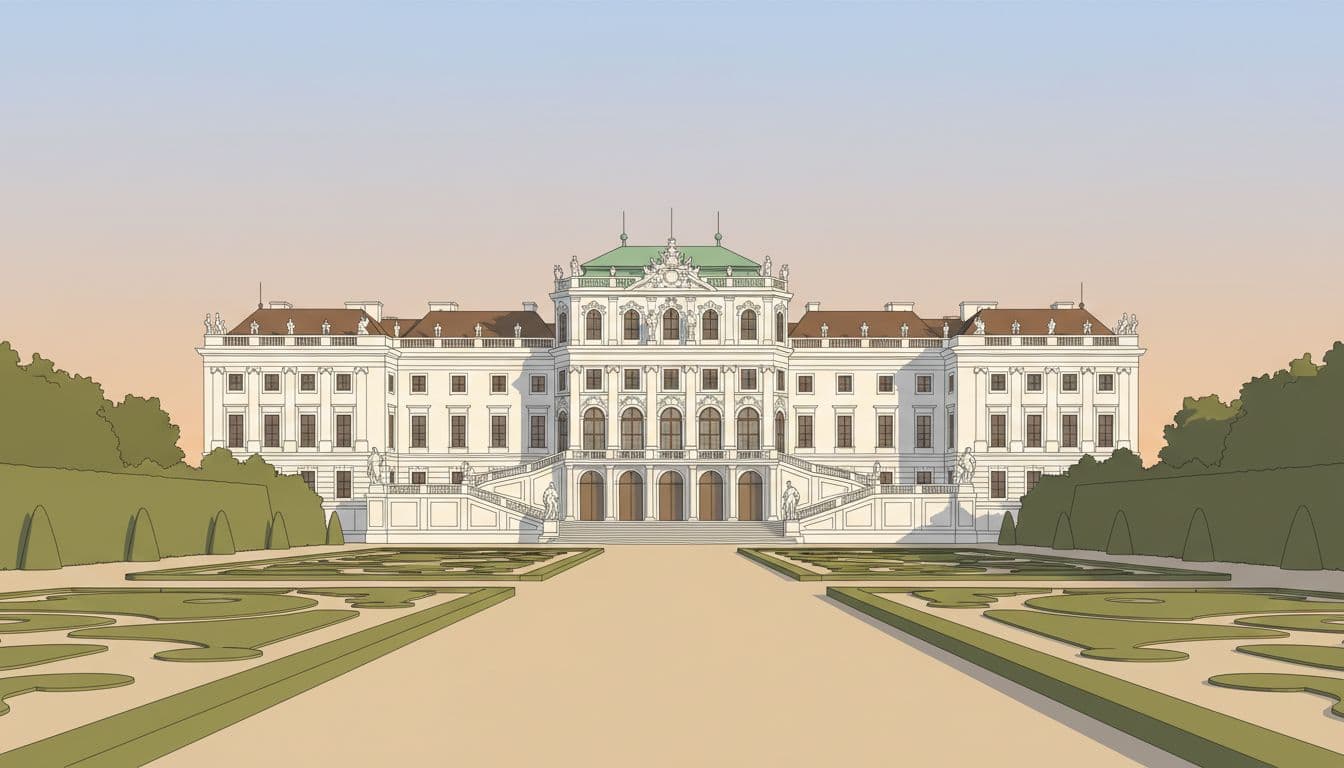
Belvedere Palace rewards photographers who love symmetry and long garden lines
Belvedere is where Vienna becomes precise. The white Baroque facade, formal gardens, and long central axis make it one of the city’s easiest places to build a balanced frame. If you stand on the main line through the gardens, the whole scene starts to lock into place, with stairways, statues, and clipped hedges pulling your eye straight to the palace.
Golden hour is especially good here, because softer light adds depth without flattening the pale facade. The shadows from sculptures and steps become more defined, while the building keeps its clean, bright look. If you want the classic shot, stay centered and use the garden geometry to create that mirror-like feel.
That said, don’t shoot only wide. Belvedere also rewards tighter studies, especially around statues, stair rails, rooflines, and facade details. Those smaller elements give you variety, and they help when the gardens are busier than you’d like. The official Belvedere gardens overview is worth checking if you want a clearer sense of the grounds before you visit.
The best results usually come from doing both:
- Start with a wide establishing frame from the central axis.
- Then move in for detail shots that isolate ornament, stone figures, and roof shapes.
- Return near sunset if you want warmer light and softer contrast.
Belvedere is one of those rare places where the full scene and the small details both carry equal weight, so it’s easy to leave with a varied set of strong architecture images.
Photograph Vienna’s churches and cultural icons when the light gets soft
After palaces and formal gardens, Vienna shifts into a different rhythm. Here, domes, spires, white walls, and gold detail do more of the work, but the light matters even more. Soft sunrise light can calm reflections and keep crowds low, while sunset adds color where stone and metal need warmth. On gray days, fine surface detail often looks better because the contrast stays gentle.
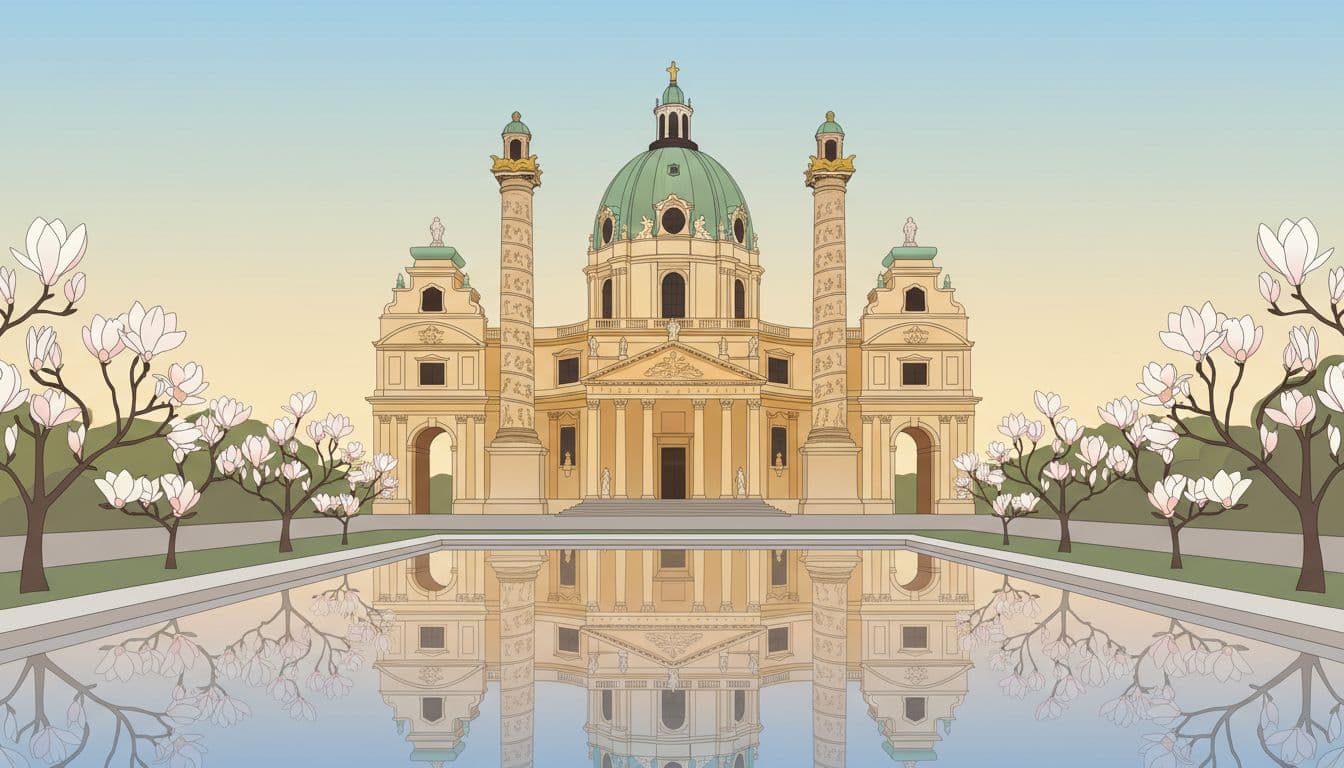
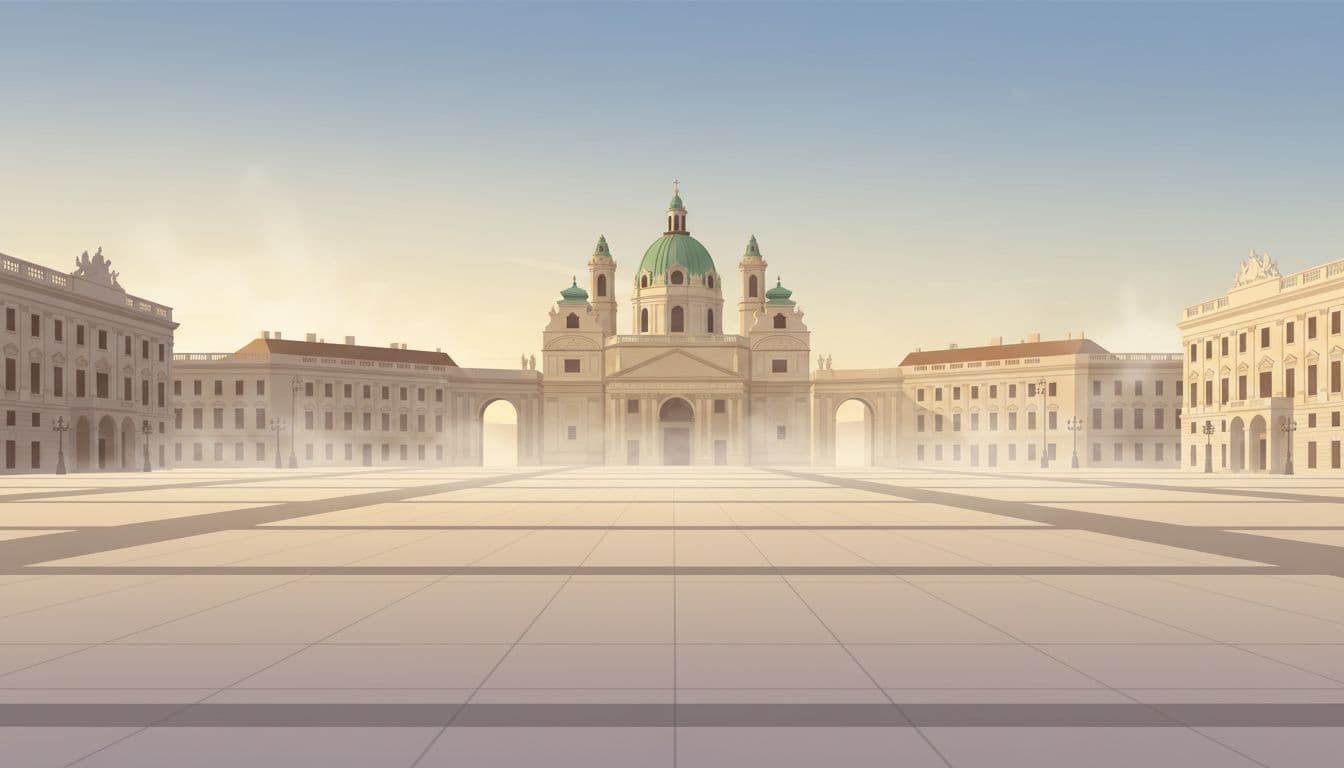
Karlskirche is one of the best reflection shots in Vienna
Karlskirche is one of those rare places where the composition almost builds itself. The large dome, twin columns, and the reflecting pool in front create easy symmetry, so even a simple centered frame looks polished. If the water is still, the church doubles itself and the shot feels almost too clean to be real.
Sunrise is often the safest bet because the water is usually calmer and the square feels quieter. Sunset also works well, especially if you want warmer color in the sky and more glow on the facade. For a quick scouting reference, this Karlskirche photo spot guide is useful before you go.
Spring gives you a bonus here. Around May, magnolia blooms nearby can soften the edges of a frame and add a wash of pink against the pale stone. If you want more than the classic front reflection, the dome terrace gives you another angle, with the square and surrounding city spreading out below.
At Karlskirche, still water and soft light do half the job for you.
The Secession Building turns simple shapes and gold detail into bold photos
The Secession Building works because it stays simple. The clean white walls and the gold-leaf dome create strong contrast, so minimalist compositions come easily. Leave extra space in the frame, keep your lines straight, and the building starts to look almost graphic.
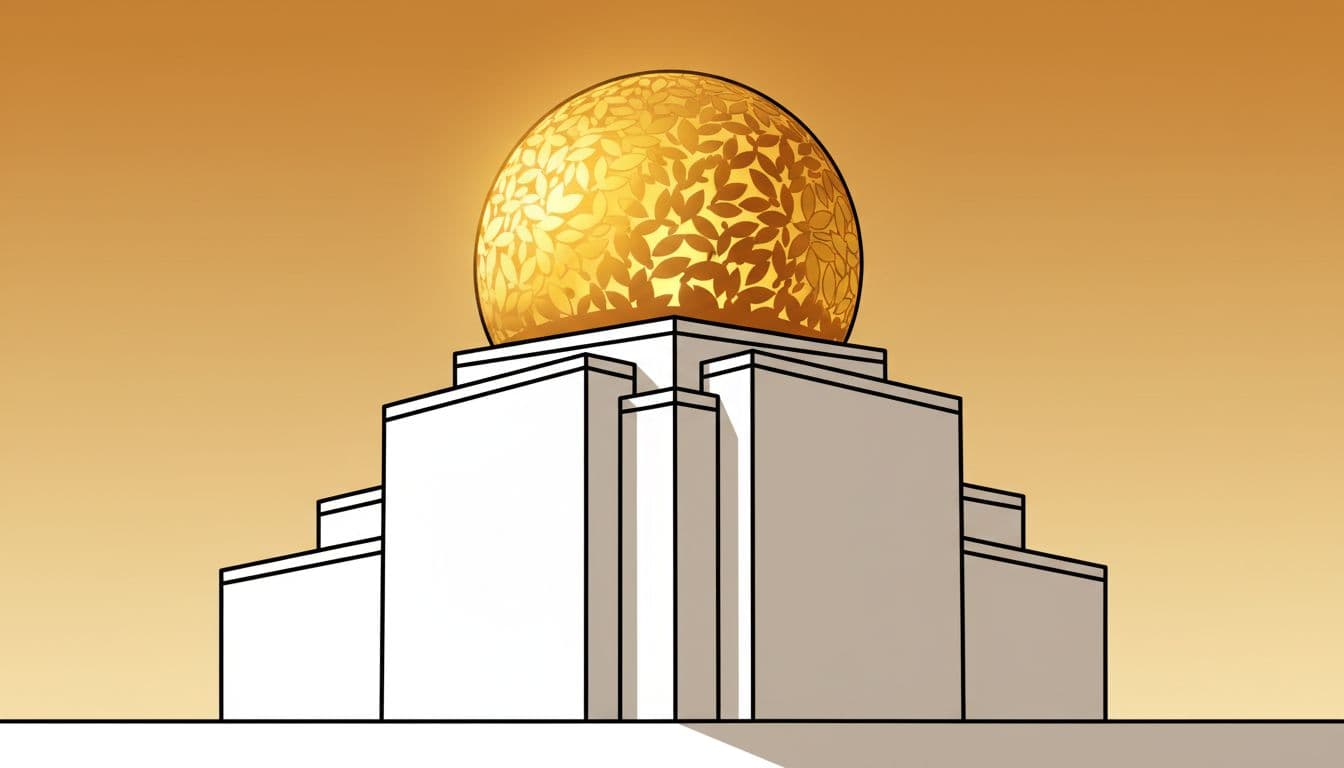
Golden hour makes the dome shine, which is perfect if you want the gold to feel rich and warm. Yet overcast light can be just as good here, because it evens out the white facade and helps you pick up surface detail without harsh shadows. If your style leans clean and modern, this is one of Vienna’s easiest wins.
Votiv Church brings sharp Neo-Gothic lines without the same crowds as the center
Votiv Church gives you height, drama, and needle-sharp vertical lines, but usually with a little more breathing room than the busiest central landmarks. Set along the Ringstrasse, it has enough open space around it to make framing easier, especially when you want the full rise of the spires without too much clutter in front.
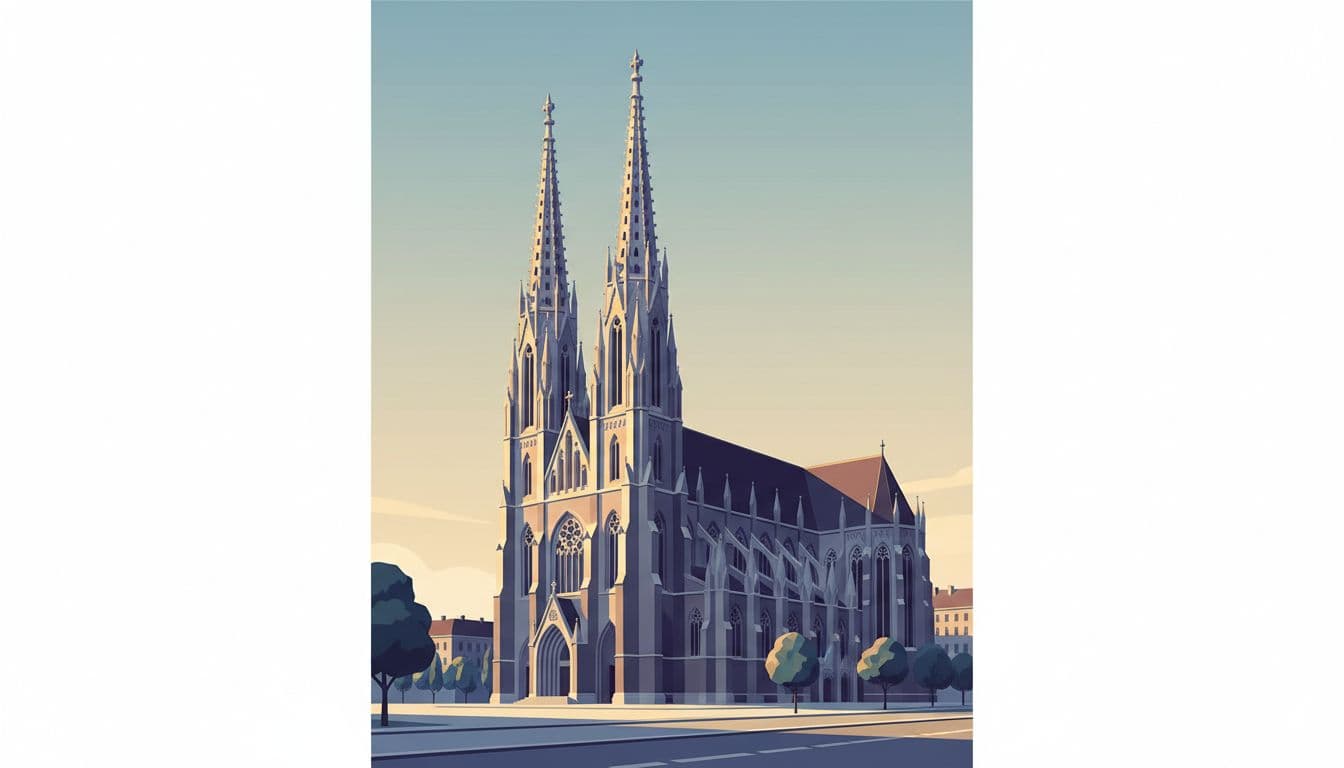
Early morning is strong here because the light stays soft and the area is calmer. Late afternoon also works, especially when angled light starts to model the facade and bring out depth in the stone. A straight-on view shows scale, but side angles often produce better photos because the church gains layers, and the long walls pull the eye toward the towers.
The foregrounds can feel cleaner here than at tighter inner-city spots, so you have more freedom to work with vertical compositions. For visitor context and location details, the official Votive Church page can help you plan your stop.
Go beyond the postcard stops for Vienna’s most interesting design details
Vienna gets even better when you step away from the obvious skyline shots. Some of the city’s most memorable frames come from places that trade monumentality for texture, color, and strange little surprises. These stops add variety to your gallery, and they also show a side of Vienna that feels more lived-in, more inventive, and less expected.
Hundertwasserhaus adds color, curves, and playful lines to your photo walk
Hundertwasserhaus looks like it refused to sit still while it was being built. Floors rise and dip, window lines feel slightly offbeat, and the facade shifts through bright patches of red, blue, yellow, and white. Then come the planted balconies, where trees and shrubs spill outward and soften the hard edges you expect from an apartment block.
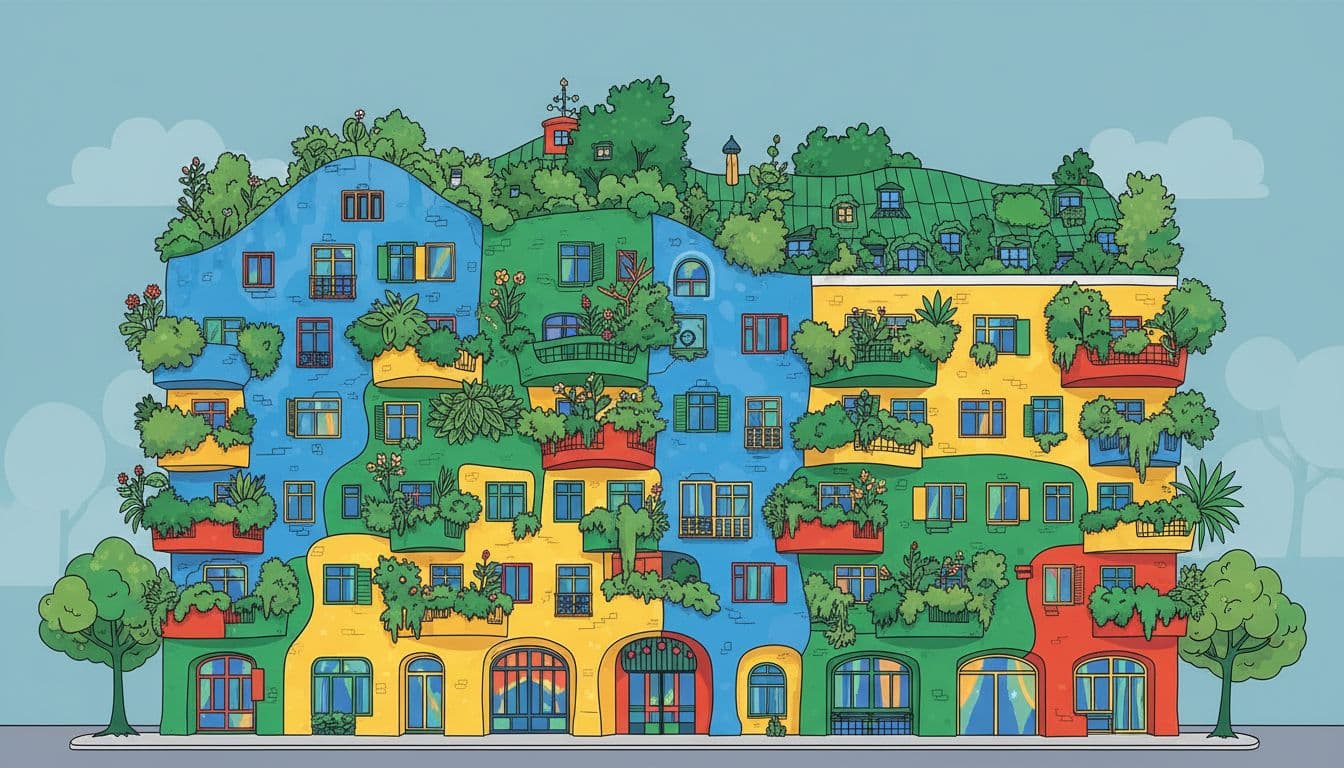
This is one of the rare architecture spots where midday can still work well. Soft light is always nice, but here the color is the main subject, so flat sun doesn’t ruin the scene. In fact, a brighter hour can help the painted surfaces pop, especially if you frame the black window outlines and green balcony growth against the stronger walls.
Because the interiors aren’t open for photography, keep your attention on the outside. The building is a private residential block, and current visitor guidance confirms it is viewed from the exterior only. For access details, this Hundertwasserhaus visitor page is a useful check before you go. Work the corners, step back for the full facade rhythm, then move closer for crooked lines, tile accents, and plants pushing into the frame. Nearby viewpoints along Kegelgasse usually give you the best mix of shape and color without feeling cramped.
Karlsplatz Stadtbahn Station shows off Otto Wagner’s Vienna in a small frame
Karlsplatz Stadtbahn Station is easy to miss because the city around it never slows down. Trams, cars, cyclists, and commuters pull your eye outward, while the station itself sits there like a jewel box. Yet once you stop and look, the details start to take over: curved rooflines, floral ornament, pale panels, gold trim, and that unmistakable Otto Wagner balance between decoration and control.
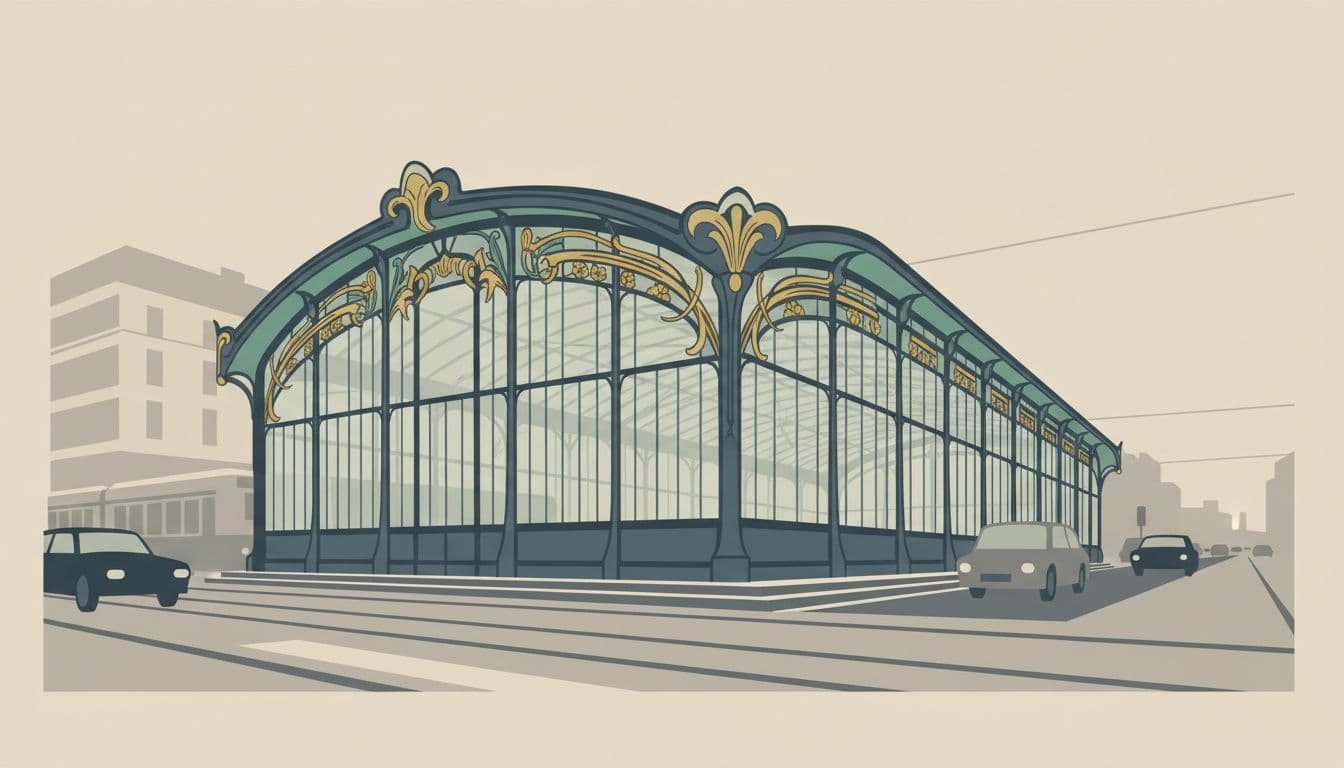
This stop rewards tighter compositions more than sweeping ones. If you try to capture everything, the station can get swallowed by the square. Instead, crop in on the arch, isolate the decorative panels, or shoot from a lower angle so the curved forms take command of the frame. Even a modest lens can do a lot here because the subject is compact.
Patience matters just as much as angle. Traffic and pedestrians will pass through your shot, so wait for those half-second gaps when the facade clears. Or do the opposite and let the city stay in frame. The contrast between refined Art Nouveau lines and the mess of daily movement gives the station its edge. If you want quick background on the building, the Karlsplatz Stadtbahn Station overview is handy for context before you arrive.
The Austrian National Library and other grand interiors need a different approach
Outdoor architecture gives you distance and freedom. Grand interiors ask for restraint. In the Austrian National Library’s State Hall, the room does most of the talking, with towering shelves, painted ceilings, globes, and long lines of columns pulling your eye inward. The light is softer, too. Window light drifts across the hall instead of striking it, so your job is less about drama and more about balance.
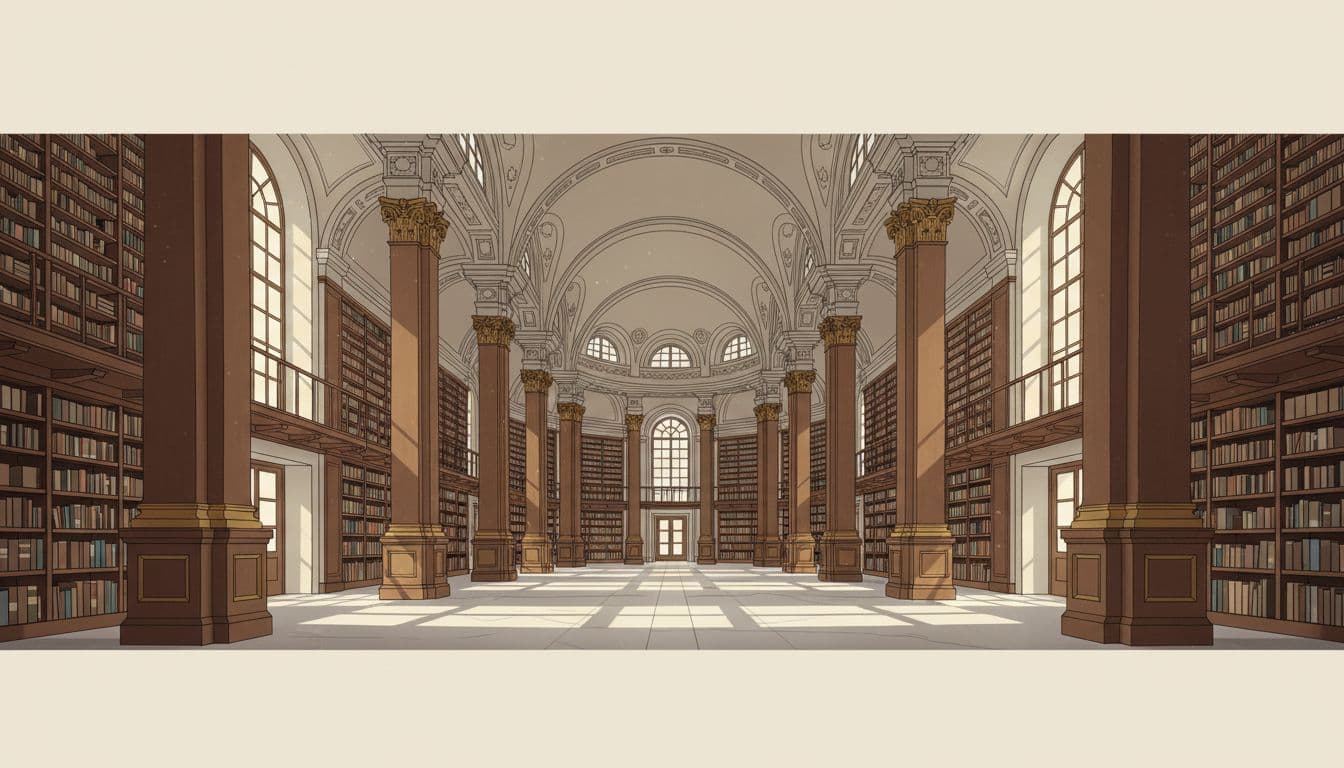
A wide lens helps if you want the full sweep of the hall, but don’t go so wide that the room starts to bend at the edges. Sometimes a slightly longer focal length gives cleaner results because it compresses the shelves and keeps verticals under control. Either way, compose slowly. Interiors reward straight lines, centered symmetry, and careful trimming of distractions near the frame edges.
You also need to respect the rules. The library’s current visitor guidance allows photography in many areas, but no flash is the safe default, and tripods are generally off-limits in the State Hall. Check the Austrian National Library FAQ before you go, because access times and visitor policies can change.
Gray days can actually help with indoor architecture photography. When the weather outside is dull, places like the library, and also the Palace of Justice staircase, feel easier to shoot because the light stays even and calm. That softer light keeps highlights from blowing out and makes stone, wood, and painted surfaces look richer. Indoors, the best images usually come from slowing down, watching the light, and treating the room like a stage set where every line has to earn its place.
See how Vienna changes from Baroque palaces to sleek modern towers
Vienna gets richer when your photo route jumps centuries in a single day. One stop gives you imperial symmetry and formal gardens, the next gives you glass skin, cool reflections, and hard-edged lines. That contrast is part of the city’s charm, and it helps your gallery feel complete instead of stuck in one mood.
Schonbrunn Palace gives you grand front views, garden geometry, and hilltop angles
Schonbrunn is more than a quick palace shot. If you want a full stop that gives you range, start at the Great Parterre, where the long garden axis leads your eye straight to the main facade. The building sits like a stage set at the far end, while hedges, paths, and fountains build order into the frame.
Because the palace grounds open early, 7:00 AM is a smart target, and even earlier can be better. The gardens are far calmer before tour groups arrive, so you can work the central line, shift slightly off-center, and try clean wide shots without people cutting through every frame. Current visitor info for the grounds and Gloriette is worth checking at this Schonbrunn gardens guide and the Gloriette visitor page.
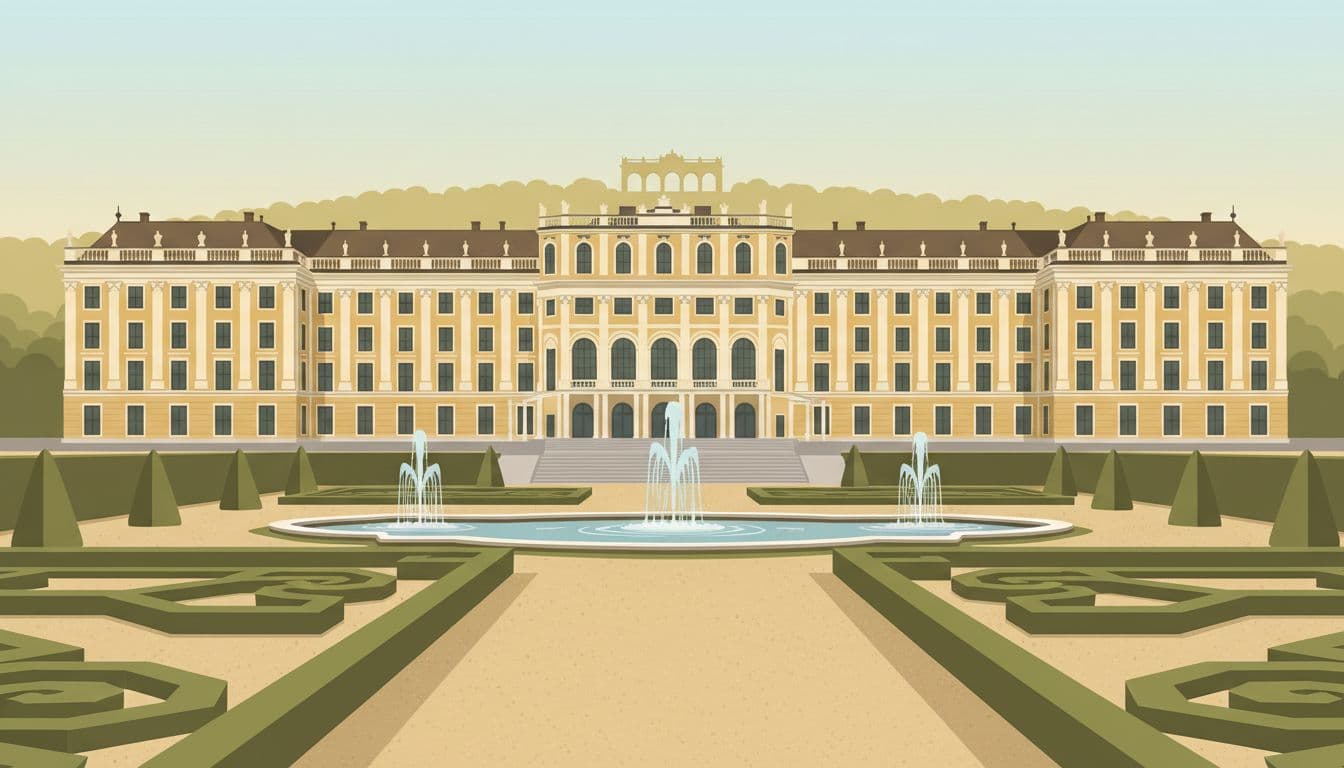
Then climb to the Gloriette. From up there, the palace drops into a larger composition, with the parterre stretched below like a patterned carpet. That higher angle is where Schonbrunn stops being just a facade and starts reading as a whole designed landscape.
If you have time, add the Palmenhaus as a side stop. Its iron-and-glass shell gives you a different rhythm, and the interior details, especially curved framing and spiral stair lines, work well for tighter studies. So instead of leaving with one postcard view, you leave with symmetry, elevation, and structure in the same stop.
DC Towers prove Vienna also works for clean, modern architecture photography
After ornate stone and Baroque order, the DC Towers feel cold in the best way. Their sharp glass planes, mirrored surfaces, and dark seams change the mood at once. You leave behind warm palace tones and step into a part of Vienna that feels crisp, spare, and almost cinematic.
That shift is useful if your photos start to look too similar. The towers suit minimalist framing, because broad sky, strong verticals, and reflective glass let you strip the image down to shape and tone. Blue-hour and overcast edits also work well here, since the cool palette already fits the subject. For angle ideas before you go, this DC Tower photo spot guide is a helpful scout.
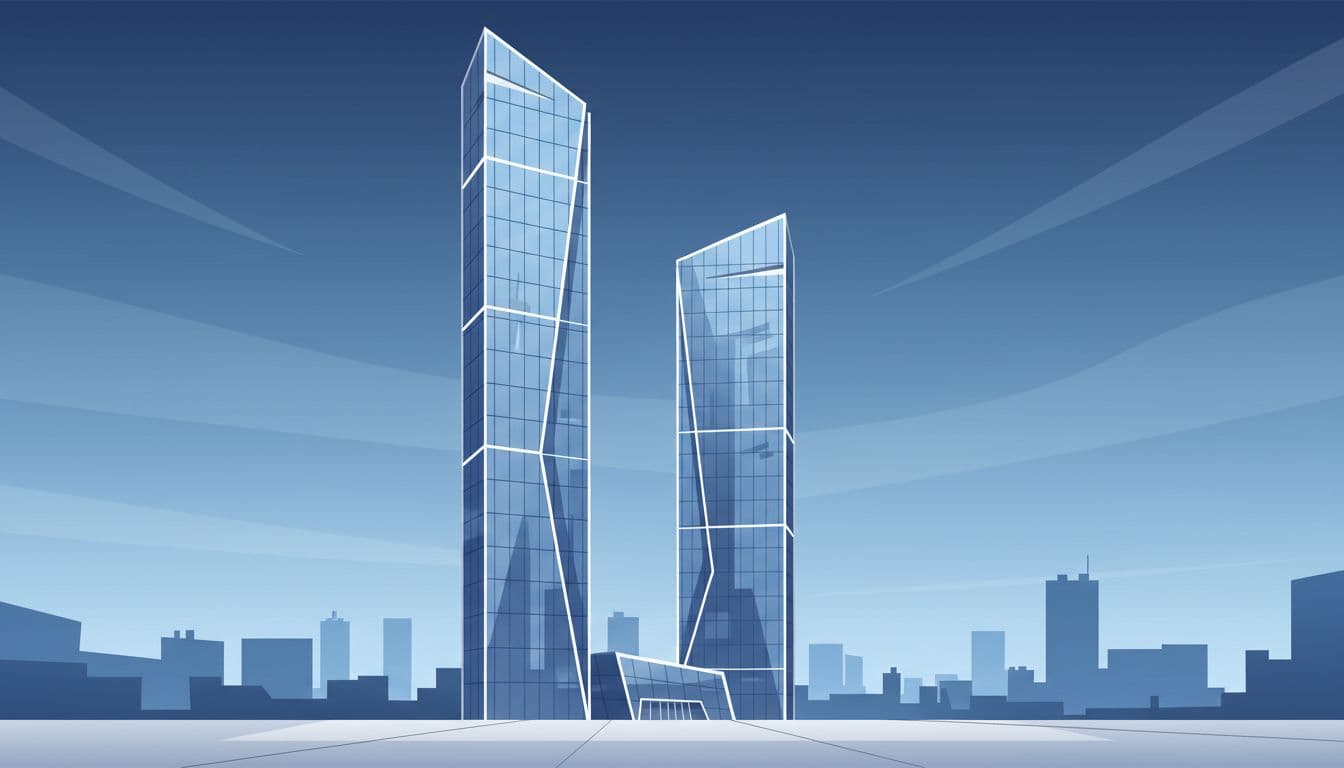
The best compositions here often rely on contrast:
- Pale sky against dark glazing
- Clean tower edges against open space
- Small human scale below, if you choose to include it
Because of that, this stop can reset your whole Vienna set. A gallery with Stephansdom, Hofburg, and Belvedere already looks strong. Add the DC Towers, and the story gets wider. You show Vienna as it is, not only as it was.
Simple planning tips that help you get better architecture photos in Vienna
Great architecture photos in Vienna usually come from small choices made before you press the shutter. Light changes the mood, the right lens changes the shape, and a little patience can turn a crowded square into a clean frame. If you plan for those three things first, the city’s palaces, churches, libraries, and modern towers become much easier to photograph well.
Choose the right time of day so the buildings look their best
In Vienna, timing does more than improve color. It changes how a building feels. Early light can make a palace courtyard look calm and formal, while evening glow can turn plain stone into warm gold.
For palace grounds and church forecourts, sunrise is usually your best window. You get cleaner paving, fewer people, and softer contrast. That’s especially helpful at places where symmetry matters. In summer, expect a very early start. Around June and July, sunrise often lands closer to 5:00 to 5:30 AM, though a more relaxed early-morning shoot in other seasons can still fall around 6:30 to 7:30 AM.
Golden hour works best when you want warm facades and gentle shadow depth. Baroque buildings, pale stone walls, and decorative fronts often look richer then because the light skims across the surface instead of hitting it flat. If you want a quick seasonal reference before you go, this Vienna photography timing guide can help you map your route.
Overcast weather is easy to underrate, but it can save a shoot. Interiors, carved details, columns, and painted surfaces often look better under cloud cover because the light stays even. You lose the harsh glare, and fine texture comes back.
Then there is blue hour, which is perfect for lit buildings like Hofburg. Once the sky cools and the lamps switch on, domes, arches, and windows start to glow. That short stretch after sunset can give you some of Vienna’s most polished architecture shots.
If the light feels too hard on stone, wait for softer light. Vienna rewards patience.
Pack light, but bring the lenses that match Vienna’s mix of spaces
You don’t need a huge bag to shoot Vienna well. In fact, lighter gear usually helps because you’ll walk a lot, move fast, and change angles often.
A wide-angle lens is the workhorse here. It helps with large facades, tight courtyards, and places where you can’t step back another ten feet. That’s the lens you’ll reach for at palaces, churches, and broad city squares.
A short telephoto is just as useful, though people often forget it. It lets you pull out sculpted doors, compress domes, and tidy up busy scenes. When a full building feels messy, a longer focal length can turn one section into a stronger image. Roof details, statues, and reflections also stand out better this way. If you want a simple primer on lens choices, this architecture lens guide is a solid place to start.
Bring a tripod if you plan to shoot at blue hour or after dark, but only where it’s allowed. It’s useful for lit facades, reflections, and low-ISO night shots. Still, many interiors and museum spaces restrict them, so check rules before you count on it. If you want to keep things simple, this setup covers almost everything:
- A wide-angle lens for full facades and courtyards
- A short telephoto for ornaments, domes, and tighter framing
- A tripod for night scenes in permitted outdoor spots
That small kit gives you range without turning your walk into a workout.
Work around crowds, rules, and weather without losing the shot
Vienna’s buildings stay still, but the city around them doesn’t. Tour groups, ticket lines, street traffic, and changing skies can all get in the way. A little planning keeps those problems from eating your best light.
Arrive early whenever the location is popular. The first hour of the day often gives you the cleanest frames and the easiest movement. For interiors or major sites, book timed entry if it’s available. That cuts waiting, and it gives you a better shot at entering before rooms fill up. Also, always check photo rules for indoor spaces. Some places allow handheld photography but ban flash, tripods, or large bags. As a safe default, skip flash indoors. It flattens detail anyway, and in grand interiors it usually ruins the mood.
Crowds need a practical approach, not a perfect one. Side streets often give better angles than the main plaza, and they can help you frame towers or domes without a sea of heads in front. When foot traffic is heavy, don’t keep firing nonstop. Wait for the brief gaps. A five-second break in the flow can save the shot.
Weather matters just as much. Bright midday sun can make pale facades look washed out and shallow. On those days, soft cloud is your friend because it keeps detail in stone, metal, and carved surfaces. For site-specific visitor rules, official pages like the Belvedere house rules are worth checking before you head out.
When you put it all together, the plan is simple: go early, carry only what you’ll use, and match your light to the building in front of you. That approach works across Vienna, whether you’re shooting a palace garden at sunrise, an ornate library on a gray day, or a lit facade just after sunset.
Conclusion
Vienna works best when you shoot it as a sequence, not a checklist. Start in the old center for the strong lines of Stephansdom or Hofburg, then add one modern stop like the DC Towers and one quieter favorite like Hundertwasserhaus or Karlsplatz Stadtbahn Station. That mix gives your photos more shape, because the city opens up through contrast.
The best photo spots in Vienna for architecture photography aren’t only the famous facades. They are the places that fit your eye for light, line, and mood, whether you want strict symmetry, worn stone, gold detail, or cool glass at dusk.
So build your route with intention. Put your busiest landmark first, your hidden gem in the soft middle light, and save your modern stop for blue hour, when Vienna’s older textures and newer edges feel like parts of the same story.