

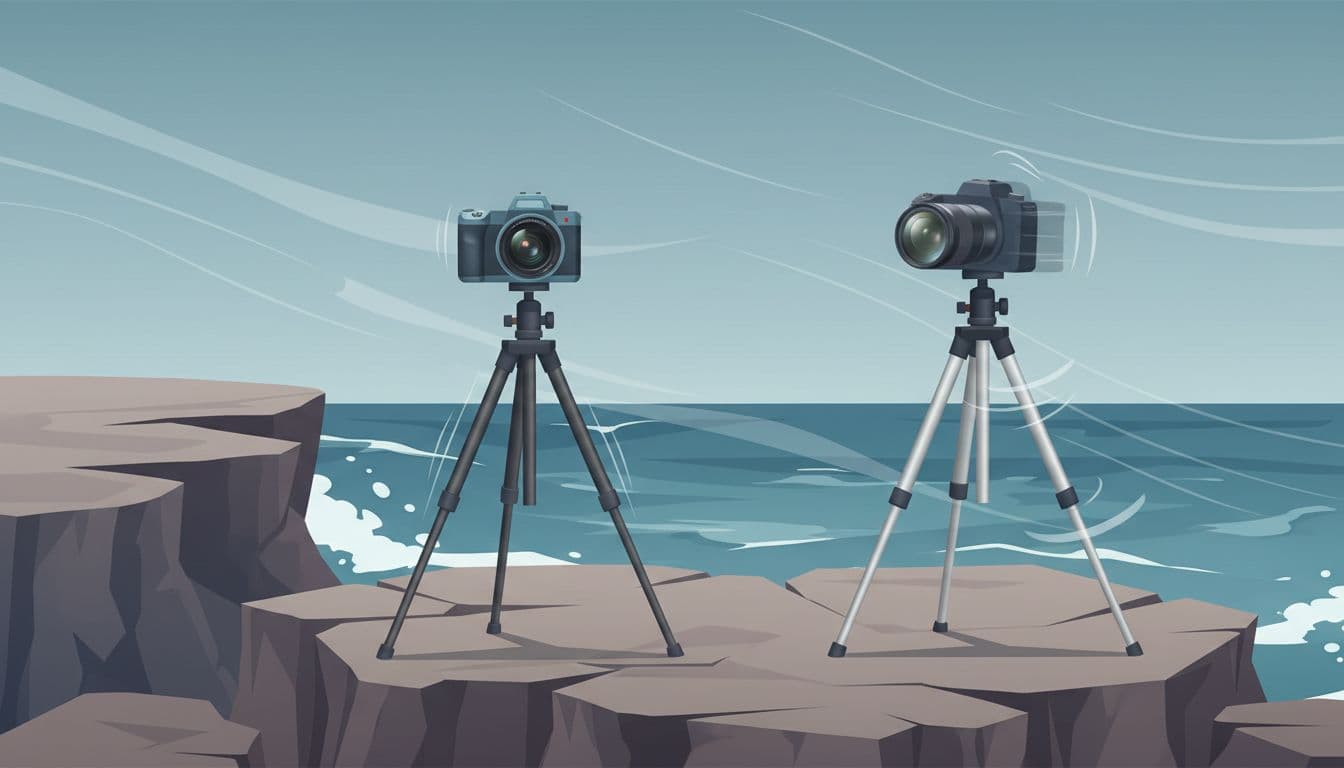
Blue hour on a rooftop, city lights start to glow, and a hard gust runs through the railings just as you frame a long exposure. The railings hum. Your shutter won’t forgive it.
I learned that on a Lisbon terrace when a slim travel tripod, perfect in my bag all day, chattered under a mirrorless body and left every highlight with a soft double edge, which is why lightweight tripods for travel photography in windy conditions can’t be judged by packed size alone. Weight lies. In 2026, the best picks matter because carbon fiber can damp vibration better, lower leg sections and a low center of gravity can hold firmer in gusts, and smart setup habits can save a shot when the forecast turns rough by the coast or on an exposed overlook. This guide stays fixed on travel tripods you can carry all day and still trust when the wind starts pushing, right down to how the feet bite, how stiff the legs feel, and what happens at 1/4 second on wet stone.
What actually makes a lightweight tripod stable in windy conditions
Wind doesn’t just push a tripod over. It sets the whole system humming, from the feet on the ground to the lens at the top. That is why a travel tripod can feel solid in your hand yet still blur a long exposure when the gusts start rolling across a lookout, beach, or roof.
The small details decide everything. Material matters. Shape matters. Your camera and lens matter too. If you want a lightweight tripod that still earns its place in rough weather, pay less attention to glossy claims and more attention to how the whole setup behaves when the air turns hostile.
Carbon fiber helps cut vibration without adding much weight
This part matters most. Carbon fiber usually gives travel photographers a better trade-off than aluminum because it stays light while doing a better job of damping vibration. In plain terms, when the wind hits, carbon fiber often settles faster instead of ringing like a thin metal tube.
That difference shows up in the real world, especially at slower shutter speeds. A gust can hit, the tripod can flex a touch, and then the material decides how long that shake lingers. According to recent roundup coverage from Digital Camera World on carbon fiber tripods, carbon fiber remains the default choice in premium tripod kits for photographers who need stiffness without hauling extra pounds all day.
In 2026, many of the strongest lightweight picks for windy travel lean on carbon fiber for exactly that reason. Models getting attention this year, including options from Peak Design, SIRUI, and K&F Concept, all chase the same goal: keep pack weight low, keep the legs stiff, and stop small vibrations before they smear detail across a skyline or wave line.
I saw this on a cold pier in Portland, Maine, with spray blowing sideways and gulls fighting the air above the pilings, where my older aluminum travel tripod kept twitching after each gust while a friend’s carbon fiber model settled fast enough to hold a half-second frame of the harbor lights.
Still, carbon fiber isn’t the automatic answer for everyone. Aluminum can cost less, take knocks well, and sometimes the extra weight helps in milder wind. Budget matters. So does how often you fly, hike, or carry a tripod strapped to a daypack for ten hours.
If you want a quick rule, it is simple: for travel photography in windy conditions, carbon fiber usually gives you more usable stability per pound. Shotkit’s carbon fiber vs. aluminum guide makes the same basic point, while also reminding buyers that price is the tax you pay for that lighter, calmer feel.
Leg diameter, leg angles, and short center columns matter more than marketing copy
Specs can tell the truth, but only if you know where to look. The most useful numbers are often buried halfway down the product page, far below the headline about “pro stability” or “all-terrain performance.”
Start with the top leg section diameter. Thicker upper legs usually resist twist and flex better than skinny ones, which matters because the top section carries more of the load and more of the vibration. A lightweight tripod with stout upper tubes often feels firmer than a taller model that saves weight by trimming leg diameter too aggressively.
Then look at leg angles. Wider stance options help because they spread the tripod’s footprint and lower its center of gravity. That gives the wind more tripod to push against at ground level, but less chance to rock the whole setup side to side. Tests discussed at The Center Column’s review of leg-angle stiffness back up what many photographers notice in the field: tripods with wider splay angles often hold steadier when the air starts shoving them around.
Short center columns matter just as much. Better yet, use no center column at all when you can. Raise that column, and you turn a compact support into a narrow pole with a camera balanced on top. More height, less calm.
That is where a lot of “lightweight but stable” claims fall apart. A tripod may look great on paper because it reaches eye level without bending, but if it needs a fully extended center column and its thinnest leg sections locked out to get there, your camera is riding on the weakest version of the design. In gusty weather, max height often means max wobble.
When you scan a product page, focus on these points first:
- The top leg diameter, not just the folded length
- The maximum height without center column
- The number of leg sections, because more sections often mean thinner lower tubes
- The available leg angles for a wider stance in wind
A very tall tripod can still be useful, of course, but only if it stays reasonably stiff at the height you actually shoot. Most travel photographers get better results by keeping the tripod lower, skipping center-column extension, and spreading the legs wider than they would on a calm sidewalk. Lower is safer. Lower is sharper.
One more thing. Tiny feet can slip. If you’re choosing between two similar travel tripods, pay attention to foot design and how the legs lock down on wet stone, boardwalk planks, or loose dirt. Wind problems often start at the ground, not at the head.
A raised center column is often the first compromise to punish you when the forecast turns ugly.
A stable tripod also depends on the camera setup sitting on top
Tripod stability is never just about the legs. The camera, the lens, the head, and how the weight sits over the platform all change the result. A small travel tripod can feel great with a compact mirrorless body and a 24mm lens, then suddenly act nervous when you mount a longer zoom.
Load capacity numbers can help, but they are easy to misread. Brands usually publish a maximum load based on static weight, not on how the tripod behaves during real shooting with wind, shutter shock, or a front-heavy lens hanging off the side. That is why a tripod rated for 20 pounds may still feel mediocre with a much lighter setup if the balance is bad or the legs are too slim.
Real-world balance matters more. A mirrorless body with a small prime is easy work. A mirrorless body plus a 70-200mm lens is different, because the weight sits farther forward and creates more leverage every time the wind nudges the lens barrel. Add a ball head that creeps a little, and the whole setup starts acting like a weather vane.
This is where small tripods struggle. They may technically hold the weight, but they don’t always control the movement. Reviews of gear for long lenses, such as this heavy-lens tripod guide, keep coming back to the same truth: a support system can pass a lab load test and still fail the sharpness test outdoors.
For travel, the safer mindset is to match the tripod to your actual shooting kit, not your heaviest possible future kit. If you mainly carry a compact mirrorless setup, a light carbon fiber travel tripod can be enough. If you often pack a telephoto zoom, you need more leg stiffness, a more secure head, and probably less faith in the big number on the box.
Use this quick filter when comparing models:
- Check the camera body weight.
- Add the lens you use most in wind.
- Notice whether that lens makes the rig front-heavy.
- Ask whether you’d trust that setup at 1/4 second on a headland.
A tripod is a system, not a stick. Put a light body and short lens on top, and many travel models behave well. Mount a long zoom, extend everything to full height, and the same tripod may quiver over every stone seam in the path, right down to the rubber foot pressed into a crack in the concrete.
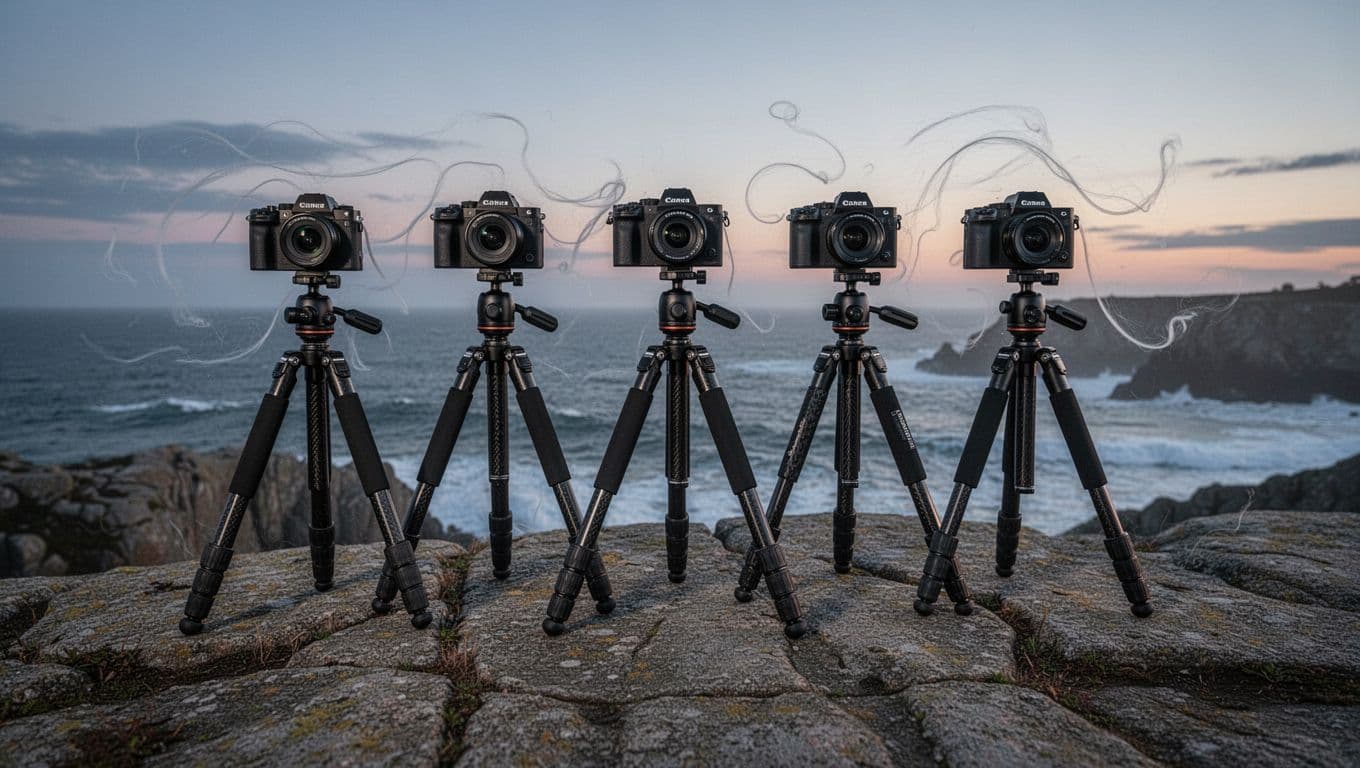
Best lightweight tripods for travel photography in windy conditions, top picks for 2026
Specs only tell half the story. In wind, the best travel tripod is the one that stays calm without turning your daypack into dead weight. Price matters too, because a tripod lives in the awkward space between insurance policy and burden.
These picks cover the main buyer types, from careful spenders to people who want the nicest kit they can justify. Some are easier to trust on a blustery overlook. Others win because you’ll actually pack them.
Best overall value, SIRUI Lightweight Carbon Fiber Traveler 5C
For many travelers, the SIRUI Lightweight Carbon Fiber Traveler 5C is the smart middle ground. It weighs about 1.9 pounds, folds down to roughly 15 inches in the class this tripod competes in, reaches around 60 inches in common listings, and carries about 13 pounds in the broader market positioning for this kind of travel support. The exact numbers vary a bit across retailers and versions, which is common with compact tripod lines, but the appeal stays the same: low carry weight, small packed size, and a steadier feel than most cheap travel sticks.
Price is a big reason it keeps showing up on shortlists. You can usually find this kind of SIRUI travel option in the $150 to $200 range, and that puts it in reach for photographers who want carbon fiber without jumping straight into premium-tripod money. Light. Compact. Easy to pack.
Its carbon fiber legs are the real draw because they help cut vibration better than bargain aluminum models while keeping the bag-friendly feel that matters on flights, trains, and long city walks. If you shoot a mirrorless body with a normal zoom or small telephoto, this is often the pick that makes the most sense, especially if you keep the thinnest leg sections tucked in and avoid raising the center column when the gusts start to slap your jacket. Recent travel-tripod testing and reviews, including this Sirui 5C review and broader 2026 travel tripod roundup, line up with that view.
I used a tripod in this class on a ferry dock in Seattle last winter, with the planks buzzing under my shoes and cold spray hitting the lens hood, and the difference between “usable” and “sharp” came down to one choice: I kept the legs low, skipped the center column, and got the frame just as a gull crossed the orange wake.
Best premium pick, Peak Design Carbon Fiber Travel Tripod
The Peak Design Carbon Fiber Travel Tripod is the premium answer for travelers who hate wasted space. It weighs about 2.8 pounds, folds to roughly 15.5 inches, reaches around 60 inches, and carries about 20 pounds, yet its packed shape is tighter and cleaner than almost anything else in this category.
That shape is why people pay more. Instead of the usual bulky gaps between folded legs, it packs into a narrow, efficient form that slips into a side pocket or carry-on with less fuss, and when you’re moving through airports, climbing stairs to a rooftop, or stuffing gear under a train seat, that difference feels bigger than it sounds on paper.
It also has a strong build and a stable feel on uneven ground, which matters when one leg lands on a rock seam and another sinks into wet soil. In gusts, it usually behaves better than many travel tripods its size because the whole design feels dense and well-resolved rather than spindly. Reviews like this Peak Design tripod review and Moment’s field take echo what many photographers notice outside: it travels beautifully and stays composed better than most compact rivals.
Still, the price hurts. Expect roughly $500 to $600, sometimes more depending on the seller. That’s a real drawback, especially when plenty of travelers shoot light mirrorless kits and don’t need the nicest folding design on the market to make a sharp 1-second exposure at a windy overlook.
Best value for compact travel, Vanguard VEO 3GO 235CB
If packed size comes first, the Vanguard VEO 3GO 235CB is easy to like. It weighs about 2.5 pounds, folds to around 13 inches, reaches roughly 57 inches, and has a load rating near 8.8 pounds. That is very compact. It disappears into luggage.
This one fits mirrorless shooters, especially people taking short city trips, weekend flights, or mixed travel where camera gear has to share space with everything else. A tripod that folds this small is much easier to bring along for skyline shots, blue-hour streets, and hotel-balcony long exposures, which means it actually gets used instead of left behind at home.
Value is the hook here, but so is portability. Reviews such as TechGearLab’s VEO 3GO 235CB test show why photographers keep considering it: the size is excellent, the build is good for the class, and it suits light travel kits well. However, the lower load rating becomes the limit when the wind rises or the lens gets heavier. A small mirrorless body with a prime is fine. Add a longer zoom on an exposed boardwalk, and the safety margin gets thin fast, especially if you extend the lower leg sections all the way.
Best budget and best pro upgrade, K&F Concept 64 inch and Gitzo GT1545T Series
These two tripods suit very different buyers, so it helps to be blunt.
The K&F Concept 64 inch carbon fiber tripod is for the photographer who wants an affordable way into carbon fiber. It weighs about 2.5 pounds, folds to around 16 inches, reaches about 64 inches, carries a claimed 22 pounds, and usually lands near $100 to $150. On paper, that looks almost too good. In practice, it can be a solid starter option for light travel kits, but stronger gusts are where budget tripods often lose their charm, because lock feel, stiffness, and vibration control tend to be less confidence-inspiring than the spec sheet suggests.
Then there is the Gitzo GT1545T Series, the pro upgrade people whisper about after handling one in a shop. It weighs about 2.3 pounds, folds to roughly 17.5 inches, reaches around 61 inches, carries about 24 pounds, and often costs $700 or more. Expensive, yes, but Gitzo has earned its reputation because the legs feel stiffer, the finish is cleaner, and the whole tripod gives off that rare sense that every part was machined by someone who hates flex as much as you do.
For pros who shoot in rough weather, work with pricier bodies, or simply want a travel tripod that feels less compromised when the wind starts pushing from the side, the Gitzo is easy to trust. Most travelers still won’t need to spend that much, though, because a lighter kit on a sensible mid-range carbon fiber tripod can already handle a lot if you stay low, brace the setup, and wait for the gust to pass before tapping the shutter on a wet stone wall.
How to choose the right tripod for your trips, weather, and camera kit
A travel tripod works best when it fits your camera, your bag, and your habits. That sounds obvious, yet plenty of people buy for max height or load rating and end up with something they stop carrying after the first trip.
Start with the kit you use most, not the dream kit you might own later. Then match that to where you go, how far you walk, and how much wind you really face. Small choices matter.
Pick for your camera, your longest lens, and the way you shoot
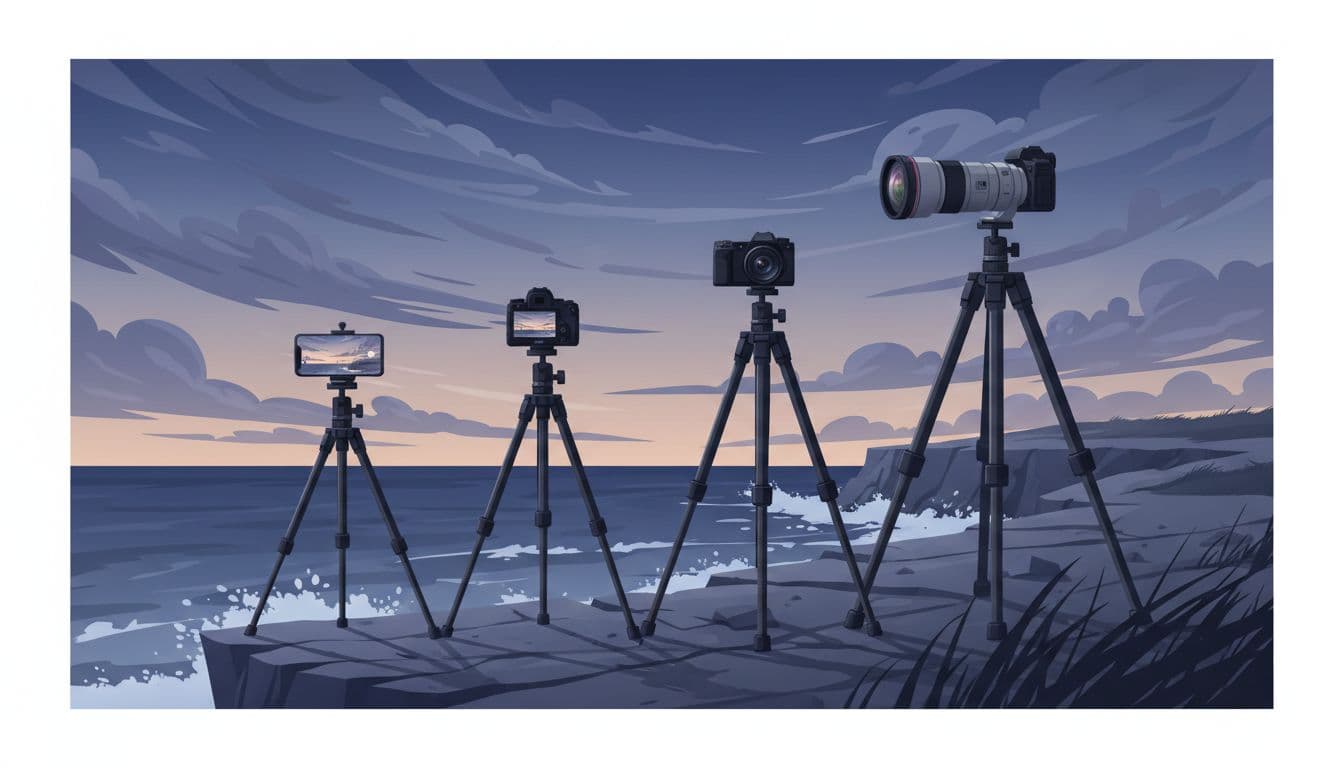
The safest way to choose a tripod is to size it for your real shooting setup. Your phone needs very little support. A compact camera needs a bit more. A mirrorless body with a kit lens can sit happily on many light travel tripods. A mirrorless body with a telephoto changes the whole picture, because the extra length creates more sway when wind hits the lens barrel.
Very light can be enough. Sometimes it isn’t.
For a phone or tiny compact, an ultra-light tripod often makes sense because the camera itself is so light that the legs do not need much stiffness to stay sharp. If you mainly shoot bright scenes, quick city shots, or short self-timer photos, the smallest option you will actually pack is often the right one.
Once you move to a mirrorless camera, the line gets clearer. A body with a 16-50mm or 18-55mm kit lens usually pairs well with a light carbon fiber travel tripod, especially if you keep the center column down and avoid full leg extension. However, a longer zoom like a 70-300mm or 100-400mm puts more stress on the whole system, so a stiffer tripod is worth the extra ounces because the shake you feel in your hands becomes blur in the file.
A simple way to judge it:
- If you shoot a phone or compact, go as small as you like.
- If you shoot a mirrorless body with a short lens, pick light weight first, then decent leg stiffness.
- If you shoot a telephoto often, buy for stiffness first, then pack size.
- If you do long exposures in wind, skip the flimsiest options, even if the spec sheet looks generous.
One October evening in Bar Harbor, I watched a traveler set up a tiny tripod with a mirrorless body and a long zoom near the shore path. The legs looked fine at first, but every gust nudged the lens a hair to the left, and he kept tightening the ball head while the red warning light on the buoy blinked in the same soft smear on every frame.
That scene sticks with me because it showed the difference between a tripod that can hold a camera and one that can steady it. Those are not the same thing. If your longest lens comes out only once a year, save the weight. If that lens is part of your normal travel kit, buy the stiffer tripod and live with a few more ounces in your bag.
A tripod should match your longest lens, not just your lightest day.
Also pay attention to how you shoot. If you mostly work low, wide, and close to the ground, you can get away with a shorter tripod that packs tight. If you often compose at eye level and hate bending, you may want more height, but only if the tripod stays stiff without relying on a tall center column. That compromise is where many travel buyers go wrong, as Pack Hacker’s travel tripod guide also points out.
Think about airports, day hikes, and cramped city streets
A tripod can be sharp enough and still be a bad travel tripod. If it catches on every doorway, sticks out of your daypack, or takes too long to set up, you’ll leave it behind in the hotel room.
Packed size matters more than many buyers admit. In airports, a shorter folded tripod slides into carry-on luggage more easily and draws less attention at security. On trains, it fits under a seat instead of blocking your knees. In crowded city streets, a slim folded shape is easier to carry at your side without clipping other people on a narrow sidewalk.
Bringable beats theoretical.
That is why folded length often matters more than a few inches of working height. A tripod that packs to around water-bottle size gets used on quick travel days because it feels easy to live with. A taller model that sticks out of the bag may be better on paper, yet it often stays home.
Setup speed matters too, especially when travel days move fast. Twist locks that open with a quick half-turn usually beat fiddly hardware when you step off a tram, spot good light, and have two minutes before it fades from the building across the street. According to Digital Camera World’s travel tripod buying guide, compact packing and practical handling are often what separate the tripod you admire from the tripod you actually carry.
In tight places, speed and shape matter even more than weight. Crowded sidewalks do not reward wide leg spread. Busy train platforms do not give you time for a slow, awkward setup. A tripod that opens fast, locks cleanly, and packs small is easier to use without feeling like you are building a tent in public.
Keep these travel realities in mind:
- A short folded length is better for flights, trains, and small bags.
- A clean packed shape matters when you walk through cities all day.
- Fast locks help on quick-moving trips.
- Extra height is only useful if you will still carry it.
The best tripod is often the heaviest one you’ll still pack every day, not the lightest one sold online. That’s the quiet truth behind a lot of travel gear advice, and Gearorbit’s guide to choosing a travel tripod gets that part right.
Set a budget, then decide where extra money really helps
Price jumps fast in travel tripods, especially with carbon fiber. Current US pricing puts lightweight carbon fiber travel tripods into four broad tiers: budget $110 to $180, mid-range $300 to $600, premium $650 to $850, and pro $1,400 and up.
Here is where the money usually goes.
| Tier | Typical US price | What you usually get |
|---|---|---|
| Budget | $110 to $180 | Lower weight, basic carbon fiber, workable locks, decent for phones, compacts, and light mirrorless kits |
| Mid-range | $300 to $600 | Better stiffness, smoother leg locks, more reliable ball heads, cleaner finish, better real-world stability |
| Premium | $650 to $850 | Excellent machining, stronger heads, tighter tolerances, nicer packing design, less flex at useful heights |
| Pro | $1,400+ | Maximum rigidity, bigger platforms, weather-sealed feel, built more for rough work than casual travel |
At the low end, you can get a perfectly usable tripod for a phone, compact, or small mirrorless setup. What you give up is usually stiffness at full height, lock quality, and head quality. A cheap ball head can be the weak point, because it may droop a little after you frame the shot. Annoying in calm weather. Maddening in wind.
Move into the mid-range, and the gains are easier to feel than to photograph in a store. The legs twist less. The locks feel cleaner. The head grips faster. More important, the tripod settles faster after a gust. For most travelers, this is the sweet spot, especially if you shoot mirrorless and want something you can trust without spending luxury money.
Then the returns start to shrink. Premium tripods are often better, sometimes much better, but the jump from good mid-range to premium does not always double your keeper rate on a trip. It usually buys refinement, confidence, and a nicer carrying experience. That matters if you shoot a lot. It matters less if the tripod comes out five nights a year.
Pro-tier prices make sense for heavy lenses, hard weather, and people who work often enough to notice small mechanical gains over time, because that level of support is built less around convenience and more around staying rigid when the wind pushes hard across open ground and your shutter is hanging at half a second over black water.
The smart place to spend extra money is usually leg stiffness and head quality. Fancy finish is nice. Better machining is nice. But if the budget is tight, pay for the parts that hold the frame still. On a cold overlook above the Pacific, with salt on the rail and one rubber foot planted in a crack in the concrete, that is the only part you will care about.
Simple ways to get sharper photos when your tripod is fighting the wind
Wind blur often comes from small choices, not bad gear. A light travel tripod can still make sharp files if you stop treating height as the goal and start treating stability as the goal. Most of the fix happens before you touch the shutter.
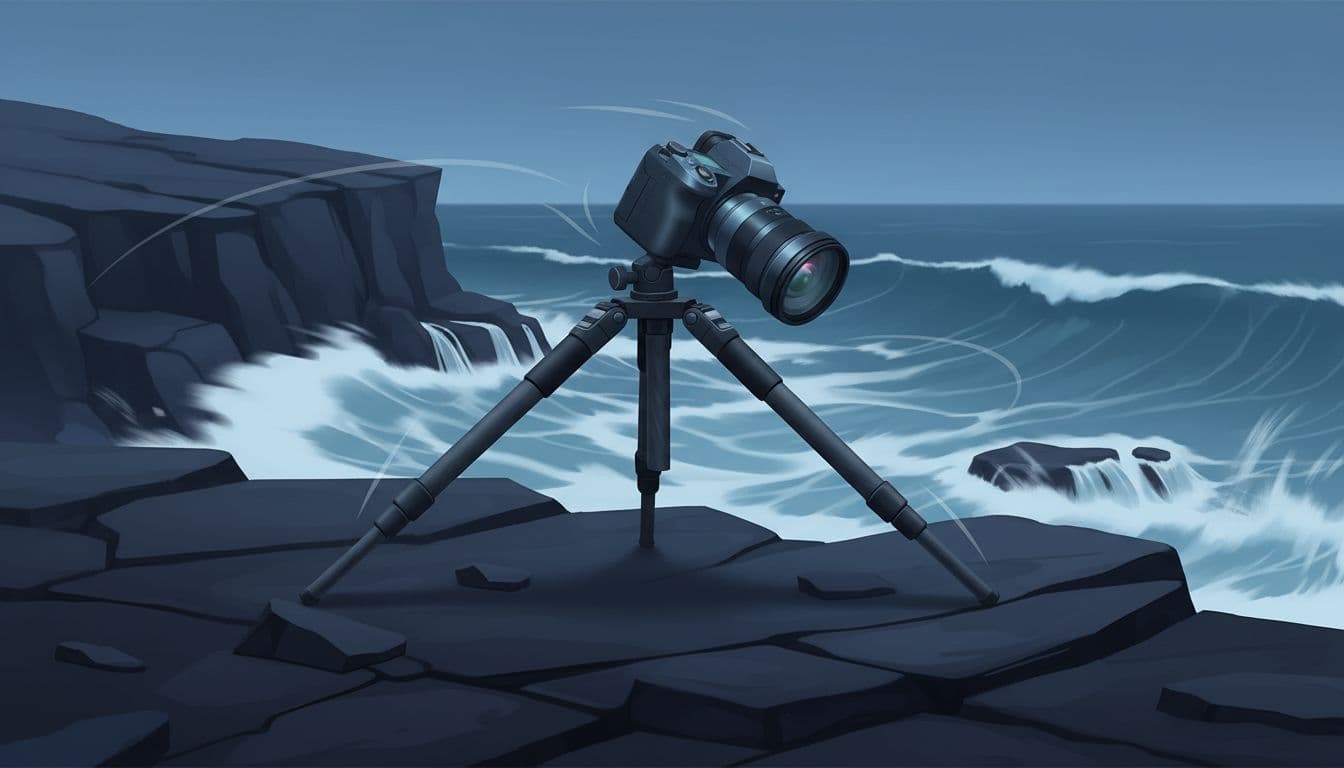
Lower the tripod, widen the legs, and keep the center column down
Start with the simplest move: bring the tripod down. In wind, lowering the camera even a little can improve sharpness more than most people expect, because every extra inch gives gusts more room to twist the legs and head.
Low and wide.
If your tripod has several leg sections, retract the thinnest ones first. Those narrow lower tubes flex the most, so keeping them tucked in usually helps more than shaving a little weight from your bag ever will. Also spread the legs to a wider angle when the ground allows it, because a broader stance gives the setup a lower center of gravity and less sway.
Keep the center column down. Always.
A raised center column turns a decent support into a wobbling pole, especially with a longer lens or a gust coming off open water, and that is why many field guides on tripod stability, including this wind setup guide, put column height near the top of the list.
You do give up eye-level comfort, of course, but sharper photos beat a relaxed neck. If the scene matters, crouch or kneel, frame carefully, and let the tripod stay short. That trade pays off fast when you’re shooting a skyline at 1/2 second or trying to hold texture in moving surf.
Use weight carefully, shield the tripod, and time your shots between gusts
Extra weight can help, but only if it stays still. Hang a bag from the hook only when it can rest on the ground or stay snug against the tripod, because a swinging bag works like a pendulum and adds motion instead of calming it. If the wind is strong enough to make your pack sway, skip that trick or pin the weight so it cannot move.
Your body can help too. Stand on the windward side and block part of the gust before it hits the camera and lens. On rough days, even a small barrier matters, whether that is your jacket, a fence post, a parked car, or a low wall that cuts the airflow before it reaches the tripod.
Wait for the lull. Then shoot.
One traveler I met on the Oregon coast kept getting soft frames of sea stacks at dusk, even though his tripod was decent and the ground was solid, so he dropped the legs lower, moved a few feet behind a stone wall, and waited for the quieter gap between gusts; the next frame finally held the edge detail in the wet rocks and the foam line near shore.
That rhythm matters more than people think, because the sharpest exposure often comes from patience, not force. A useful breakdown of real-world counterweighting at the coast is in AltiPod’s wind stability notes, especially the point that weight helps only when the whole system settles instead of swinging.
One more small fix helps here too: remove or secure the camera strap if it is flapping. Fabric catches wind fast, and a loose strap can tap the tripod leg or lens barrel like a tiny flagpole rope on a sleepless night.
Pair tripod technique with shutter delay, remote release, and lens stabilization settings
Once the tripod is planted well, reduce the shake you create yourself. A 2-second shutter delay is one of the easiest ways to get sharper photos in wind, because it gives the tripod time to settle after you press the button. A remote release does the same job and feels even cleaner during long exposures.
This part is boring. It works.
If your camera has a remote app, cable release, or wireless trigger, use it when the shutter speed is slow and the wind keeps nudging the setup. Even a light finger press can add enough vibration to smear fine detail in city lights, tree branches, or distant windows, especially when you’ve already pushed the tripod close to its limit with a small travel setup on exposed ground.
Stabilization needs a quick check too. Some lenses and some in-body image stabilization systems work well on a tripod in wind, while others can create blur if the camera is already very steady. Settings vary by camera, so check your manual and test your own setup before a trip. Photography Life’s advice on sharp photos in wind makes the same practical point: don’t rely on old blanket rules when modern stabilization behavior changes from one system to another.
A simple routine helps:
- Set the tripod low and wide.
- Turn on a 2-second timer or use a remote.
- Check stabilization for your camera and lens.
- Fire the shot during a calmer moment.
Tiny inputs matter. So does timing. If the gust just rattled the lens hood, wait another second and watch the front leg on the wet stone.
Which travel tripod is the best fit for most photographers in 2026
For most photographers, the “best” travel tripod isn’t the lightest or the most expensive one. It’s the one you’ll pack without a second thought, trust when the gusts hit, and still feel good about after the credit card bill lands. Start with fit.
Wind changes the math fast. A tripod that feels fine in a living room can turn twitchy on a cliff walk or a hotel balcony, so the smart pick is usually the one that balances stiffness, size, and price without leaning too hard on any single spec. Price still matters.
On a cold morning near Cannon Beach, I watched a friend swap out his bargain tripod after one set of blurry wave shots and borrow a compact SIRUI instead; same camera, same lens, same wind, but the second setup settled faster and held the sea stack edges sharp at half a second.
The best choice for most travelers, for tight budgets, and for premium buyers
If you want the short version first, this table gets you there fast.
| Best for | Pick | Why it fits |
|---|---|---|
| Most travelers | SIRUI | Best balance of price, packed size, and real stability for mirrorless travel kits |
| Tight budgets | K&F Concept | Low-cost entry into carbon fiber, good for lighter cameras and occasional windy use |
| Premium buyers | Peak Design | Superb packed shape, smart design, and strong stability if you want the nicest travel experience |
| Compact value | Vanguard | Very easy to pack, great for city trips and light kits where every inch of bag space counts |
| Pros needing maximum stiffness | Gitzo | The best choice when sharpness matters more than price and you push gear in rough weather |
For most readers, SIRUI is the safest call. It hits the sweet spot that many travel photographers actually need, light enough for flights and day walks, stiff enough for a mirrorless body in gusty conditions, and priced far below the luxury tier. Recent roundups, including tested travel tripod picks, keep putting SIRUI near the top for that exact reason.
If your budget is tight, K&F Concept makes sense. You give up some polish and some confidence in stronger wind, yet you still get a compact carbon-fiber tripod that works well for lighter setups, short trips, and photographers who don’t live at slow shutter speeds every weekend. Good enough often wins.
Then there’s Peak Design, which is for buyers who hate bulky gear and don’t mind paying for a smarter form factor, cleaner packing, and a more refined feel in daily use, especially if the tripod will spend as much time in airports and side pockets as it does on the ground. Reviews like this Peak Design carbon-fiber review show why it stays on so many premium shortlists.
Vanguard is the compact value pick. If your bag is already packed tight with a jacket, charger, water bottle, and one extra lens, that smaller folded size matters more than a slightly taller working height. Small bag, small win.
Gitzo is the answer for pros and demanding shooters. If you carry better glass, shoot long exposures in exposed places, or simply want the stiffest travel-friendly legs in this group, Gitzo earns its price with fewer compromises and more trust when conditions turn mean. Stiffness wins in wind.
That leaves one practical takeaway for 2026 buyers: choose SIRUI if you want the best fit for most trips, choose K&F if price leads the decision, choose Peak Design if packability and finish matter most, choose Vanguard if space is tight, and choose Gitzo if you’re staring at a dark shoreline through a telephoto while one tripod foot presses into wet stone.
Conclusion
The right tripod is the one that makes the flight, the walk, and the cold wait before dawn, then still feels steady after you spread the legs wide and keep it low. Carryable matters. So does trust.
I learned that on a Maine pull-off before sunrise, when the wind came off the water hard enough to sting my hands, and the shot only held because the tripod was already low, the center column stayed down, and the feet bit into gravel instead of skittering on the shoulder.
So buy the one you’ll bring. Set it lower than feels natural. Then let the weather do what it wants while your tripod feet press into cold gravel at sunrise.