

Buying used is how many first-time travel photographers get better image quality and enough budget left for the extras that save a trip, a sharper lens, a spare battery, and a bag that doesn’t fight you at the airport. More lens money. Less weight. Lower risk.
That appeal is real, especially when you want a light kit you won’t baby on buses, ferries, or long walking days, but a low price stops being a deal the second a flaky shutter, worn battery door, or dirty sensor shows up halfway through a week away. I learned that the hard way in Lisbon, when a bargain camera kept throwing card errors on tram rides and turned a sunrise at Miradouro da Senhora do Monte into a long, panicked restart instead of a photo.
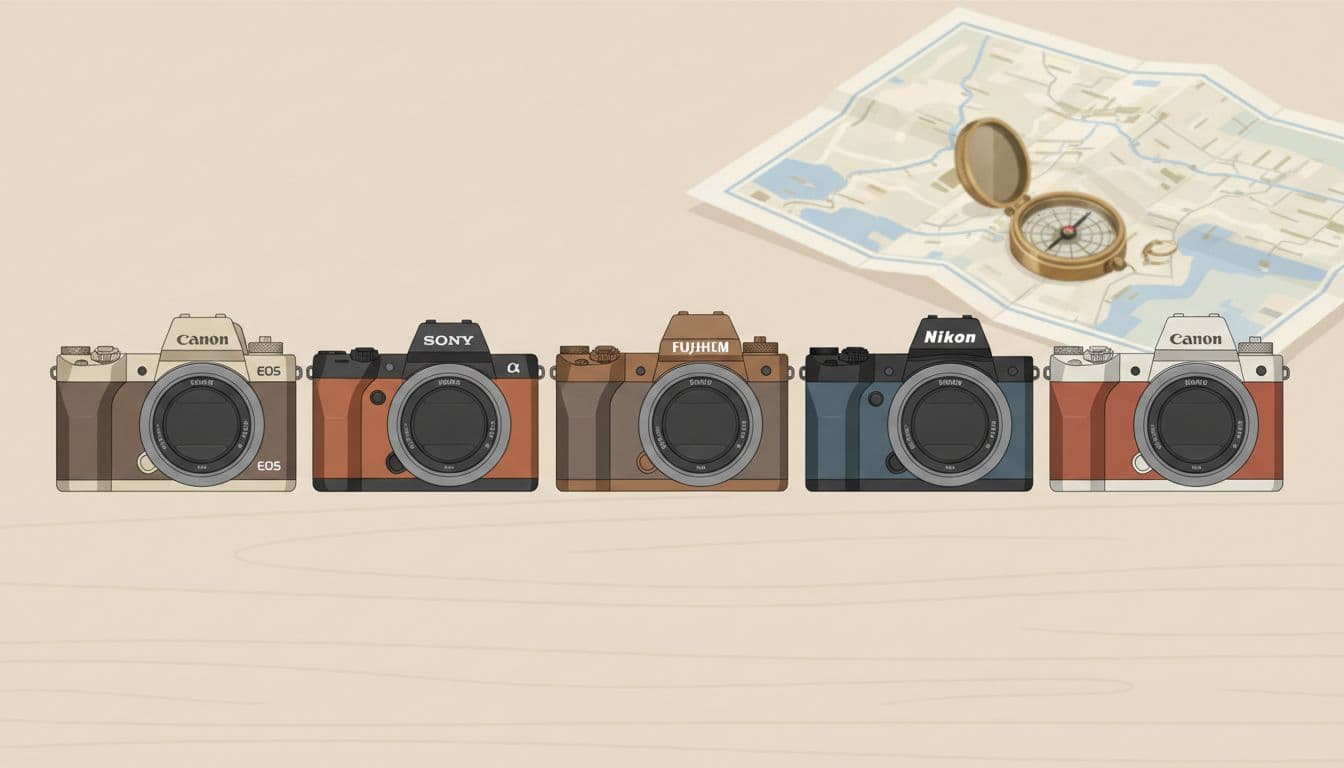
Right now, popular used picks in 2026 include the Canon EOS R50, Sony ZV-E10, Fujifilm X-T30 II, Nikon Z50 II, and the budget Canon R100, while step-up bodies like the Fujifilm X-T5 and Sony A7C II cost more and can be more camera than your first trip needs. Start here. Before you pay. Keep this checklist beside you when you inspect the sensor, test the card slot, and check the battery latch.
Set your travel budget before you fall in love with a camera body
A used mirrorless camera can look cheap until the rest of the kit catches up with you. The body gets all the attention, but travel photography happens with batteries in your pocket, a card in the slot, a lens on the mount, and a bag you can carry for eight miles without hating it. Small costs pile up fast.
I like to set a hard ceiling before I browse listings. That number keeps you from buying the shiny body first, then cutting corners on the parts that make the camera usable on a real trip.
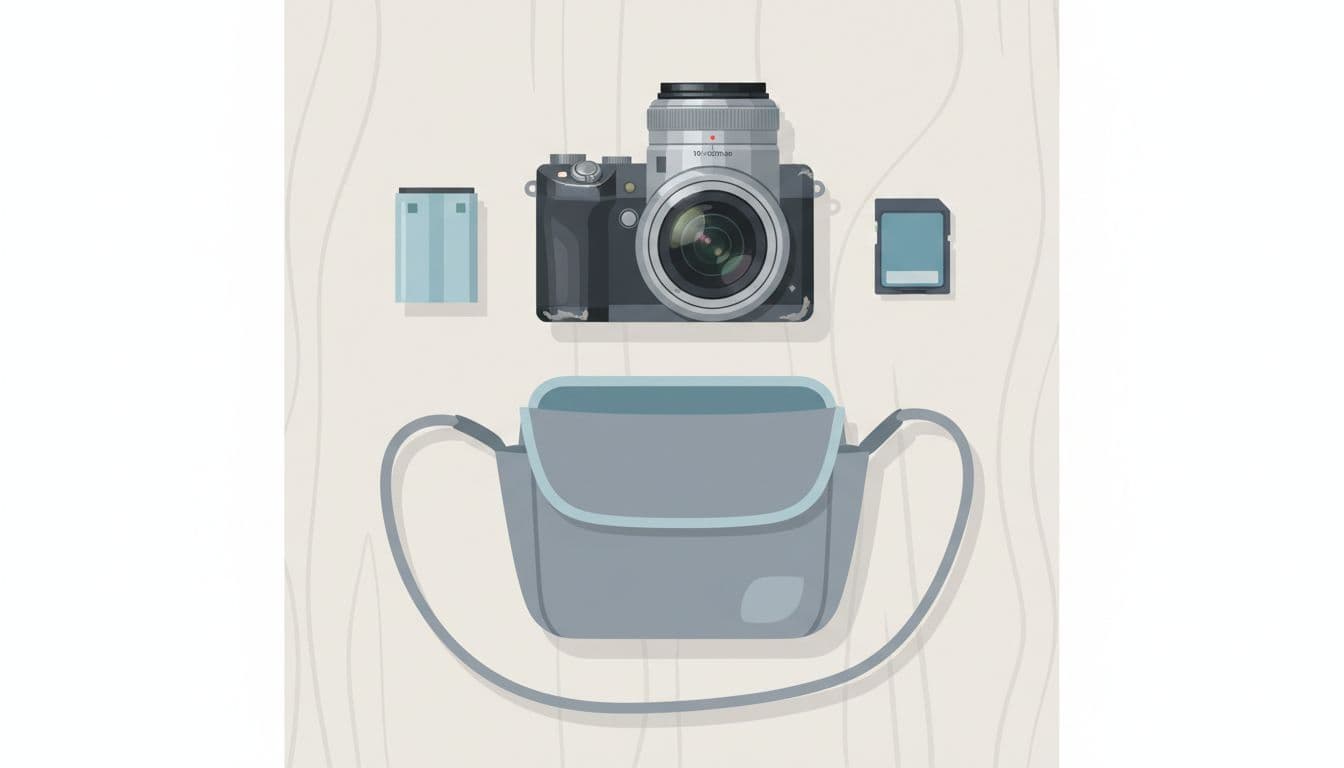
Count the full cost, body, lens, battery, card, and bag
The sticker price is only the first line of the receipt. If a body looks like a steal but needs a lens, a fresh SD card, two batteries, and a bag, your “deal” can turn into a full-price kit by the end of the night.
For most first-time travel photographers, a used body with a basic zoom is the smarter first buy than a body alone. A simple 16-50mm or 18-55mm lens covers streets, food, interiors, and quick landscapes without forcing you to shop for glass right away. That matters because the lens you can actually afford and carry often gets more use than the dream lens still sitting in your browser tabs.
Here’s the budget most people forget to build:
- A used camera body
- A starter travel zoom, often 16-50mm or 18-55mm
- At least one extra battery
- One solid SD card
- A small bag or insert that protects the kit
Those add-ons are not tiny on travel days. Extra batteries often cost about $20 each if you buy used or third-party, and one spare rarely feels like enough when you’re out from breakfast to blue hour, using maps on your phone, shooting bursts, and checking shots on the rear screen in bright sun. Travel days are long.
Last spring in Chicago, I watched a friend buy a used body the night before a trip and feel great about saving money. By the time he added a worn kit zoom, two third-party batteries, a 128GB card, and a cross-body bag at the airport shop because he had nowhere safe to stash the camera, he had spent more than a cleaner camera-and-lens bundle would have cost two weeks earlier.
So price the whole kit first. If the numbers feel tight, skip the fancy body and buy a complete setup that works on day one. A camera without a lens is a paperweight with a strap lug.
For a real-world reference point, Canon’s own refurbished EOS R50 kit pricing shows how often a body-plus-lens package gives better value than piecing things together later.
Choose APS-C or full-frame based on weight, price, and trip style
Sensor size sounds technical, but the travel trade-off is simple. APS-C usually gives you a smaller bag, lower prices, and lighter lenses. Full-frame can give you better low-light performance and more room to grow, but it usually costs more and asks more from your shoulders.
Weight changes everything.
If you’re flying with one backpack, riding trains, or walking all day through a city, APS-C often makes the most sense. The bodies are usually smaller, the lenses are often cheaper, and the whole kit feels easier to keep with you instead of leaving it back at the hotel because it has become a chore by noon.
That last part matters more than specs. A camera you carry all day beats a better camera left in the room safe.
Full-frame still has a place. If you shoot lots of night scenes, dim interiors, or want stronger background blur with certain lenses, it can pay off. But first-time travel photographers often underestimate the real cost of going full-frame, because the jump is not just the body price but the lens size, spare battery count, and bag space that grow with it after checkout.
This is where trip style should decide the format:
- If you want a light, flexible travel kit, APS-C is usually the better fit.
- If you plan to shoot low light often and don’t mind more bulk, full-frame can make sense.
- If your trip includes long walking days, choose the setup you’ll still enjoy carrying at 4 p.m.
For many beginners, APS-C hits the sweet spot. You get very good image quality, lower used prices, and a system that feels less like luggage. Bodies such as the R50, X-T30 II, or ZV-E10 stay popular for that reason. They leave room in the budget for the boring but useful stuff, like a second battery and a bag that fits under the seat.
Canon has a clear APS-C vs full-frame explainer if you want a quick side-by-side before you shop. Read it, then picture yourself on day three of a trip, climbing subway stairs with your jacket tied to your backpack.
Know when a cheap deal is too cheap
Low price gets attention fast, especially when you’re new and every listing feels like a race. Still, a camera priced far below common 2026 used ranges often comes with a catch, hidden faults, missing parts, heavy wear, or no return option when something goes wrong.
A few current examples help set the floor. A Canon EOS R50 body plus kit lens often lands around $400 to $600 used, which lines up with listings like this used R50 kit at UsedPhotoPro and recent Canon refurb pricing. A Fujifilm X-T30 II commonly gets discussed in the $500 to $700 range for a fair used buy, although cleaner copies and dealer listings can run higher, as you can see on MPB’s X-T30 II listings. A Sony A7C II sits in a very different tier, and a realistic used range is closer to $1,000 to $1,400.
So if you see an A7C II for $650, stop. That price is not a gift. It is a warning light.
Some deals go bad in familiar ways:
- The battery and charger are missing, so your low price isn’t low anymore.
- The seller avoids photos of the sensor, rear screen, or lens mount.
- The listing says “tested” but offers no return window.
- The kit lens is absent, replaced, or damaged.
- Shutter count is unknown, and the body shows heavy wear.
One low number on a marketplace page can pull you in harder than it should, especially when the photos are clean, the seller says “works great,” and someone else has already added it to a watch list while you are still zooming in on a scuffed battery door at 11:47 p.m. Don’t buy under that kind of pressure.
Price matters, but context matters more. Compare the listing against dealer prices, check whether the body cap, charger, and battery are included, and ask why the seller is under market by a wide margin. If the answer is vague, move on.
The good used deal usually looks boring. Fair price. Clear photos. Honest wear. A real return policy. That’s the one you want when you’re standing in an airport line at 5:30 a.m. with one backpack and gate B12 on the screen.
Pick a used mirrorless camera that fits the way you actually travel
A travel camera should match your days, not your wish list. If your trips mean long walks, carry-on bags, quick cafe stops, and tired feet by late afternoon, the best used mirrorless camera is usually the one that feels easy to bring everywhere. Small wins here matter more than bragging rights later.
I learned this on a damp weekend in Portland. A friend packed a heavy full-frame body with a fast zoom because it looked “serious,” then left it in the hotel on day two and borrowed my tiny APS-C kit for the Japanese Garden. He came back with better photos, mostly because he actually had the camera in hand when the light hit the maple leaves.
Best beginner-friendly used picks in 2026
For first-time travel photographers, a few used models keep rising to the top because they solve real problems on the road.
The Canon EOS R50 is the easiest all-around pick for many beginners. Its autofocus is fast, the menus make sense, and it feels friendly right away. Used pricing in the US still makes it attractive in 2026, and Canon’s own kit comparisons also show why many beginners move up from the R100 to the R50 for a smoother hybrid experience, as covered by Digital Camera World’s R100 vs R50 kit breakdown. One drawback: the RF-S lens lineup is still less exciting on the used market than Sony’s E-mount.
The Sony ZV-E10 is a smart choice if your trip includes lots of video, casual vlogging, or handheld clips on trains and ferries. It’s compact, light, and backed by a deep used lens system. Still, there’s a real trade-off, because it has no viewfinder, and bright midday sun can make rear-screen shooting frustrating.
Then there’s the Fujifilm X-T30 II, which many travelers love for color straight out of camera. It also stays small enough to slip into a jacket pocket with the right lens, and that matters when you don’t want to look loaded down. The catch is simple: Fuji’s used prices often stay high, so a “deal” may not feel cheap.
The Nikon Z50 II makes sense if you want a body that feels more solid in hand. Grip, balance, and general handling are strong, which helps on long days when a cramped body starts to annoy you. However, it usually costs more used than the entry-level Canon options, so it can be hard to justify for a first weekend-heavy travel kit.
The Canon R100 is the budget pick. It’s often one of the cheapest ways into a current mirrorless system, and it can absolutely make nice travel photos. Short version. It cuts costs in ways you’ll notice, especially with more basic controls, weaker video features, and a less polished feel than the R50.
If you want one safe answer, start with the R50. If video comes first, look hard at the ZV-E10. If color and style matter to you, the X-T30 II is still tempting.
Features that matter more on a trip than on paper
Travel exposes weak points fast. A spec sheet won’t tell you how a camera feels after six hours on foot, when your bag strap is digging into your shoulder and you’re trying to shoot a street scene before the light changes.
Weight matters more than most beginners expect. A camera can seem “small enough” at your desk, then feel like a brick by mid-afternoon in New Orleans, Boston, or San Francisco when you’ve already walked miles and climbed stairs with a water bottle, charger, jacket, and snacks.
Also, easy menus matter. You don’t want to hunt through tabs while a market vendor laughs, a tram pulls away, or a sunset fades behind a church tower. The faster you can change focus mode, exposure, or video settings, the more likely you’ll keep shooting instead of fumbling.
Then there is reliable autofocus. Good autofocus saves moments when people move, when your train window gives you one clean chance, or when you hand the camera to someone else for a quick photo. That kind of help is more useful than an extra bump in megapixels.
A few practical features deserve extra weight:
- Decent battery life, because travel days run long and charging options aren’t always close.
- A flip screen, if you want selfies, family shots, or easier low-angle video.
- Affordable used lenses, because one body is only the start.
Weather sealing and in-body image stabilization can help, especially if you travel in rain, low light, or shaky transit. Even so, beginners shouldn’t overpay just to collect every feature. A lighter body with one good used zoom often beats a pricier camera stuffed with extras you may never use.
For lens-system depth alone, Sony keeps an edge, and comparison pages like this Canon R50 vs Sony ZV-E10 review hint at why so many buyers weigh the body against the mount. The body gets the spotlight, but the lens shelf decides how affordable the system stays a year from now.
Buy for the trip you actually take, not the one you picture in your head.
Common beginner mistakes when choosing a travel camera
The biggest mistake is buying too much camera. A heavy full-frame body can sound exciting, but for weekend city trips it often turns into hotel-room luggage. Your back votes.
Another common miss is choosing a vlogging camera with no viewfinder, then realizing you hate composing on a bright rear screen at noon. That trade-off is fine if video is your priority. It feels rough if you mostly want still photos in harsh daylight.
Many beginners also chase megapixels and ignore the boring stuff. Battery life. Lens prices. Size. If the body is cheap but the lenses cost a fortune, your budget gets squeezed later, usually right when you want a better travel zoom before a flight.
Some shoppers also forget to match the camera to how they pack. A body that needs a bigger bag changes everything, especially on airlines with tight personal-item rules or on trips where you want the camera tucked under a light rain shell and not swinging at your side through a crowded subway car.
Inspect the used camera carefully before you hand over money
A used mirrorless camera can look fine in listing photos and still hide trouble in the joints, doors, and little moving parts you only notice once it is in your hand. Slow down here. Five careful minutes can save you from buying someone else’s airport headache.
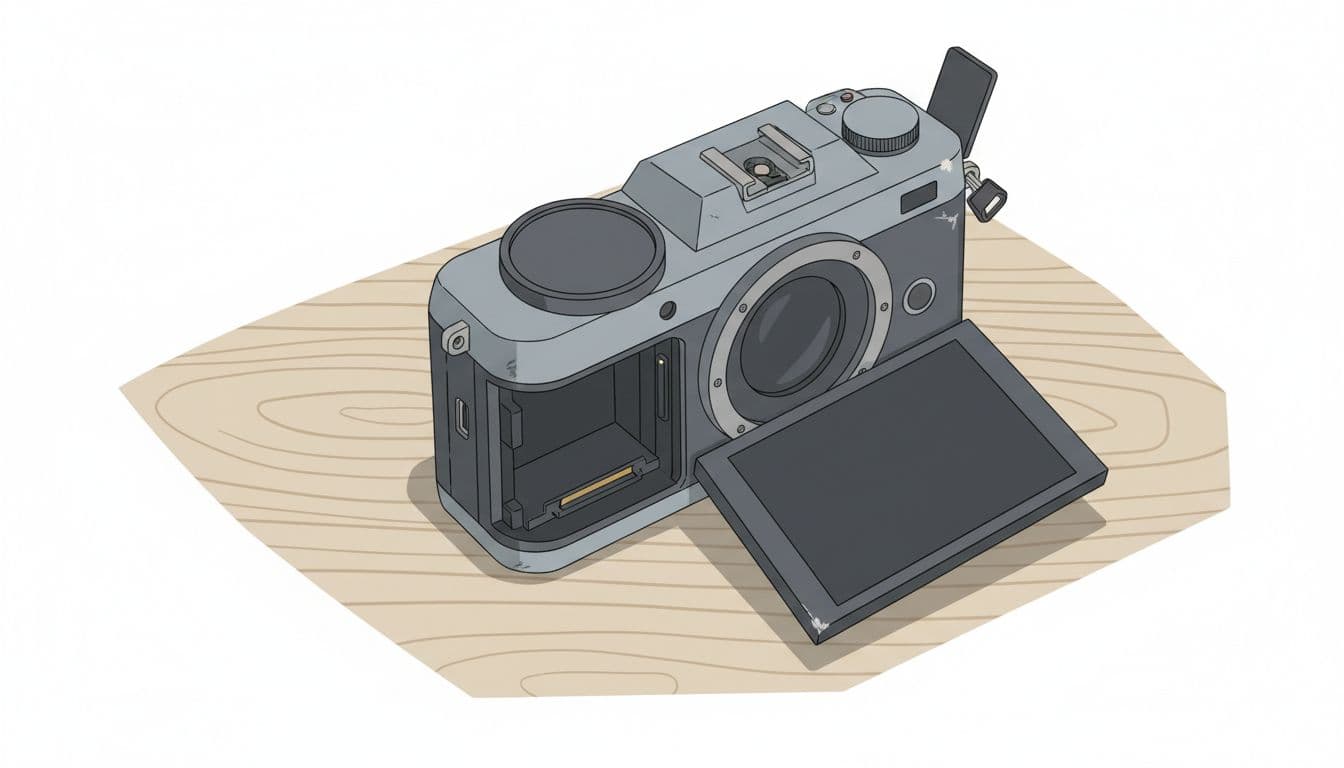
Check the body, screen, sensor, mount, and ports
Start with the outside, because hard use usually leaves a trail. Look for cracks, deep dents, loose rubber grips, and doors that don’t sit flush. Light scuffs are normal on a used travel camera, especially near the bottom plate or strap lugs, but damage near the lens mount, card slot, or screen hinge deserves more attention because those areas take stress every time you shoot, swap cards, or pack the camera.
Small marks are fine. Bent parts are not.
Then check the weak spots up close. The hot shoe should not look chewed up or loose. The battery door should close cleanly and not bow outward. Open the card and port covers, then inspect the edges for cracks, broken hinges, or a warped fit that suggests a drop. If a USB or HDMI port feels loose, that matters more than a few shiny corners on the grip.
Next, remove the lens and inspect the mount and sensor area in good light. The metal mount should sit flat, with no bent tabs or stripped screws. On the screen, watch for scratches, odd color patches, and dead pixels, which often show up against a plain bright image. On the sensor, a little dust can be normal and often harmless, but scratches, oily streaks, or marks that won’t move are another story. For a simple step-by-step reference, this used mirrorless camera inspection guide lines up well with what you should check in person.
Damage tells a story. Listen to it.
Test buttons, autofocus, shutter, card slot, and battery health
Once the body passes the first look, make the camera work. Turn every dial. Press every button. Flip the screen, open the menus, switch from photo to video, and make sure nothing sticks, skips, or needs a hard press to respond. A used camera should feel worn, maybe, but not tired.
Do a fast real-world test instead of poking at menus for ten minutes, because a few bursts, a short video clip, quick playback review, and one card write test will tell you more than a seller saying “everything works great” ever will.
Bring a memory card and a charged battery if you can. Take single shots, then fire a short burst and listen for anything odd. Autofocus on a near subject, then a far one, then track something moving, even a person walking past or a car rolling through a parking lot. Record a short video, play it back with sound, and check that the file saves properly. If the camera freezes, throws a card error, or takes too long to write, walk away.
I once checked a used body outside a coffee shop in Portland, and everything looked clean until burst mode stalled after six frames and the card light stayed on like a tiny red warning flare for almost twenty seconds. The seller blamed my card. I tried his card, and it did the same thing.
Battery health matters, too. If the camera has a battery health menu, check it. If not, shoot for a few minutes and watch the percentage drop. A battery that plunges after a short test will get ugly on a long travel day. Also make sure the camera charges normally with the included charger or USB port if the model supports in-camera charging.
Shutter count is only one clue. It’s still worth checking, and tools like ShutterCount can help if the camera stores that data in the file. For many first-time buyers, under 20,000 actuations often feels like a comfortable range. Still, don’t treat that number like gospel. Some mirrorless cameras rely heavily on the electronic shutter, so a low count does not automatically mean light use, and a higher count on a well-cared-for body may be less risky than a low-count camera with sticky buttons and a flaky card slot.
Inspect the lens, because a bad lens ruins a good body
A clean camera body paired with a bad lens is still a bad deal. Check the front and rear elements first in angled light. Tiny cleaning marks may not matter much, but deep scratches, chips, or coating damage should lower your confidence fast. Then look through the lens for fungus, haze, and large dust clumps. A few small dust specks inside are common. Web-like fungus or foggy haze is not.
Now move the lens the way you would on a trip. Turn the zoom ring through the full range and feel for rough spots, stiffness, or a sticky patch. Switch to focus and listen. The autofocus motor should sound normal for that lens, not loud, strained, or jumpy. Mount the lens on the body and check for wobble where it locks in place. A little play can be normal on some lenses, but obvious rocking is bad news.
Also test any stabilization built into the lens. Take a few shots at a slower shutter speed, then listen and feel for the stabilizer kicking in. If the image jumps strangely in the frame, rattles, or seems to fight you, that lens may need work. Broken stabilization can turn a “cheap starter lens” into money you wish you had kept for train tickets and dinner.
A basic kit lens can still be the smartest first travel lens if it’s clean, cheap, and working right. It covers a lot, weighs little, and asks less from your bag. You do not need exotic glass for a first trip. You need a lens that focuses well and doesn’t make every image look like it was taken through a dusty window on seat 14A.
Ask the seller these questions before you pay
The camera in your hand matters, but the seller’s answers matter too. Ask plain questions and listen for plain answers. If the story gets fuzzy, treat that as part of the condition report.
These are the questions worth asking before money changes hands:
- Why are you selling it?
- How long have you owned it?
- Has it had any repairs?
- Is the original charger included?
- How is the battery condition?
- Has it ever overheated?
- Have you noticed any autofocus or focus accuracy issues?
- Has it been dropped or used in rain?
- Can you share a few fresh sample photos from today?
A careful seller usually answers without much drama. They know when they bought it, what they used it for, and whether the battery has gone soft with age. On the other hand, vague answers, a missing charger, or a refusal to show recent files should put you on edge. If someone says, “I never really used it,” while the hot shoe is worn raw and the battery door looks bent, trust your eyes first.
For extra perspective, this piece on questions to ask before buying used camera gear covers the same basic idea from the seller side. You are not being rude by asking. You are checking whether the facts line up.
Paperwork helps. A receipt is better. Fresh images are best.
If the seller sends sample photos, open them full size and look for spots, strange blur, and missed focus. If you’re meeting in person, ask them to take one new frame right there and hand you the camera to review it. A clean answer often sounds calm and boring. A bad deal usually starts to wobble when you ask for one more image of the brick wall across the street at f/8.
Buy from the right place and protect yourself after the sale
Where you buy a used mirrorless camera matters almost as much as which camera you buy. A lower price can feel great for ten minutes, then feel awful when a sticky shutter or bad card slot shows up the night before your flight. For a first purchase, boring is good. Clear grades, real photos, and a return window can save your trip before it starts.
Where first-time buyers usually get the safest used deals
For most beginners, the safest used camera deals come from established resellers and solid local camera stores. Shops like KEH and MPB usually inspect gear, assign condition grades, and give you some kind of return or warranty protection, which lowers the chance that your “great deal” turns into a box of stress on day two.
That protection costs money. Usually, you will pay a little more than you would through a private seller on Facebook Marketplace or Craigslist. Still, that extra cost often buys the things a first-time travel photographer needs most: predictability, a paper trail, and a way back out if the camera arrives with a hidden problem.
Local camera stores sit in a nice middle ground. You can hold the camera, test buttons, and ask questions face to face, but you may still get store-backed returns or short warranties. That is a strong option if you are new and want human help without the full risk of a parking-lot deal.
A quick comparison makes the trade-off easier to see.
| Place to buy | Price | Risk | Best for |
|---|---|---|---|
| KEH, MPB, B&H, Adorama | Usually higher | Lower | First-time buyers who want grading and returns |
| Local camera store | Mid-range | Lower to medium | Buyers who want to test in person |
| eBay top-rated sellers | Often lower | Medium | Careful shoppers who read listings closely |
| Facebook Marketplace | Often lowest | Higher | Local buyers who can inspect before paying |
| Craigslist | Often lowest | Higher | Experienced buyers who can spot problems fast |
The cheapest option is rarely the safest. The safest option is rarely the cheapest. That is the trade.
eBay can work well, but only if you are picky. Look for top-rated sellers, detailed photos, a strong feedback history, and a clear return policy. If a listing has vague language, one dim photo, and “no returns, sold as-is,” keep moving. A good used listing should feel plain and open, not slippery.
Facebook Marketplace and Craigslist can offer the best prices, especially when someone is unloading a body fast before a move or an upgrade. Yet those platforms ask more from you. You need to judge the seller, inspect the camera, and spot missing pieces in real time. For an experienced buyer, that can be worth it. For a first timer, condition grades and return windows are often worth the premium because they turn a gamble into a purchase.
A return window is not a luxury on your first used camera. It is part of the price.
How to pay safely and avoid simple scams
Payment method is part of the safety check. If the seller wants a wire transfer, gift card, or full payment before you even see the camera, walk away. Fast.
For local sales, meet in a public place with good light, solid foot traffic, and enough room to test the camera. A coffee shop, camera store lobby, or even a library entrance works better than a random curb at dusk. Craigslist’s scam guidance keeps the advice simple: deal locally and in person, because that avoids a huge share of common fraud.

If you are buying through eBay or a shipped listing, use a payment method with real buyer protection. Sellers may push for friends-and-family payments or off-platform apps to “save fees.” Don’t do it. Once you step outside the platform rules, you often step outside the protection too, which is why Facebook also warns buyers to be careful with advance payments in its Marketplace scam advice.
You also want to avoid casual “as-is” language unless the price is low enough to cover repair risk and you know exactly what you are doing. For a beginner, “as-is” often means “you own the problem now.” No charger. No battery. Trouble.
That last part matters more than many buyers realize. A camera sold without a battery or charger creates a testing problem, and a testing problem creates risk, because you cannot confirm basic things like startup, battery drain, charging, shutter response, video recording, or whether the camera throws card errors after ten frames instead of one.
If possible, check the serial number against the box or receipt. At minimum, make sure the number has not been scratched off or covered. A seller who refuses to show the serial number, will not let you test the camera, and still wants payment first is not offering a bargain. They are offering a headache.
One rule has saved many buyers from dumb losses: never send money for a camera the seller will not demonstrate. Last year, a friend almost prepaid for a “mint” Fujifilm body from a local seller who said the battery was dead but promised it worked. He passed, found another one a week later, and learned the first seller had reused the same photos under a different name.
What to do in the first 24 hours after buying
The first day is your safety net. Use it.
As soon as the camera is in your hands, charge everything, insert your own memory card, and reset the camera to factory settings. Then check whether the firmware is current. If the maker offers an update, install it carefully and only with a well-charged battery, because you want a clean baseline before you trust this camera on a trip.
Now test it in the kinds of light you will actually face. Shoot outside in daylight. Then try low light indoors or at dusk. Autofocus can behave well in one setting and fall apart in another, and a camera that seems fine under noon sun may start hunting the second you step into a station, museum, or dim cafe.
Open the files on a larger screen, not just the rear LCD. Problems hide on a tiny display. On a laptop or monitor, you can spot missed focus, dead pixels, odd color shifts, banding, and sensor dust much faster. Take one photo of a plain bright wall or clear sky at a narrower aperture to check for dust spots, then zoom in and inspect the frame.
Also test the practical stuff that gets ignored during a quick meetup:
- Make sure the battery charges normally.
- Confirm your memory cards read and write without errors.
- Test both card slots if the camera has two.
- Record a short video and play it back.
- Check every port and flap you might use while traveling.
Then take the camera on a short local walk. Twenty minutes is enough. Bring it to the park, the corner store, or the train platform you already know. That small outing turns desk testing into real use, and real use exposes the weird faults, such as a strap lug that digs into your hand, a lens that loses focus after sleep mode, or a card slot door that only fails when the camera bumps your jacket zipper.
A good anecdote for this part of the article is easy to picture: a buyer discovers a bad card slot during a neighborhood test, not at the airport gate, with boarding already underway and seat 22A blinking on the screen. Wouldn’t you rather find out beside your own mailbox at 6:40 p.m.?
Conclusion
The right used mirrorless camera for travel is the one that matches your trip, your budget, and your current skill level, because a light body you trust and understand will earn a place in your bag long after a heavier “better” camera gets left behind at the hotel. Fit matters most.
I still think about a friend in Portland who bought a bigger full-frame body for a weekend away, then handed it back to me after one rainy afternoon because my smaller APS-C camera was the one he could actually carry, frame, and use without fighting it. Skill level matters, too.
Buy lighter than you think, inspect more than you expect, and then test before you fly, so the first real proof of your purchase isn’t a blinking error at boarding but a calm night-before routine at the kitchen table. No surprises at the gate, just a charged battery and the clean click of the card sliding into place.